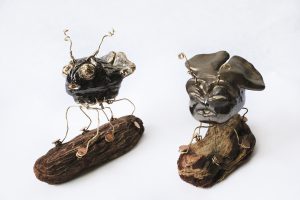
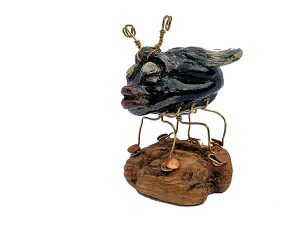
The Evolution of Ceramic Woodland Insects

posted in: Blog, General | 0

Late May 2017 – On a sunny Sunday, I spied a shiny black beetle at the side of a path whilst hiking in the Heritage Grove Redwoods, La Honda, California.  I realized instantly that this bug would make a perfect model for a ceramic insect that I would coat with some recently-purchased Black Luster overglaze.
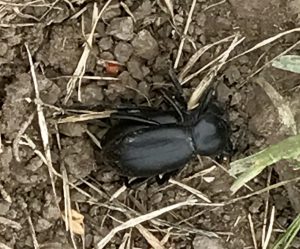
Luckily, my hiking partner had his iPhone and took this Photo.

Research revealed that this creature has the fantastic name of Darkling Beetle.
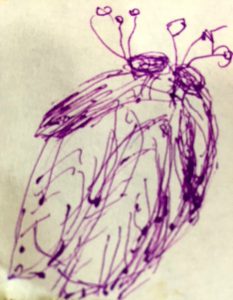
I sketched what I had in mind for making a ceramic bug.

My idea was to make antennae and legs from wire leftover from my hobby of making earrings, using wire-wrapping techniques learned back then.

The bugs would be mounted on driftwood collected from the beach earlier in the year after a gigantic storm.

Copper tacks from my late-father’s stash of hardware would be perfect for attaching the bugs to the driftwood.

I hand-built 6 experimental bugs out of high-fire stoneware clay.  Each started as a closed pinch pot.  Different features were added, such as up-lifted flared wings, bugged eyes, mouth/lips.  I made protruding eyebrows and sled feet, with holes to accommodate the later addition of wire antennae and legs.

After the bugs dried, I applied various combinations of underglaze colors for highlighting different features.  All bugs survived the bisque firing.

For glazing, I experimented with various glossy glazes, including Palladium (Silvery Black), Saturation Gold, Pansy Purple, and Transparent.

After the glaze firing, the bugs needed enhancement with Luster overglazes.  Lusters contain precious metal elements, such as real gold, which give a glittery and/or iridescent effect.  For most of the bugs, Black Luster was used to make their bodies shinier, and to highlight their wings.   Opal Luster was applied to wings (including underneath). Gold Luster was applied to lips, eyes, and/or to highlight the tips of wings.  The pieces were re-fired at Cone 020 (1180 F), with the end result being a shimmery finish, gorgeous to look at.

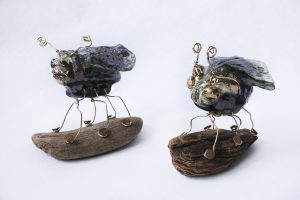
Created 2 antennae and 6 legs from gold wire which was threaded through holes in each bug, coiled with pliers.  The last step — no small effort — was to wrestle the bugs onto their driftwood mounts using vintage copper tacks.

December 2017 (6+ months later) — The inspiration of seeing a little black beetle evolved in my brain and hands into totally unique and eye-catching fantastical art pieces.  Also appropriate for older children interested in insects — adorable companions or a great addition to a bug collection.

Each one measures approx. 2+″ x 3+” x 2+″

Listed for Sale on Etsy.com, click on LegalizePotteryShop.
Fish in 3D

posted in: Blog, Uncategorized | 0

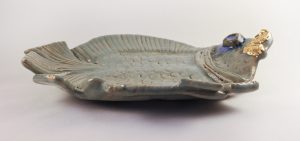
I’ve made loads of Fish Dishes in the past, 22 at last count, and the Legalize Pottery site has a whole page devoted to Fishes.  But so far the fish have been two-dimensional.

large_green_fish_goldlips_platter_side


While functional, my Fish Dishes aren’t what fish are all about, so to speak.  Now I’ve started to make some three-dimensional fish — sculptural, decorative, more fish-like, with a whimsical flair.

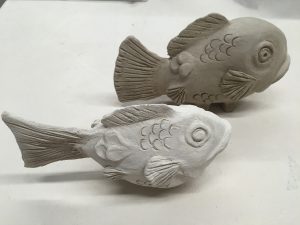
The basic technique is to start with a pinch pot, close up the top, and use a paddle to beat it into shape (no fish were hurt or injured during this process).  With the time-consuming addition of eyes, lips, tail, fins, scales, the fish is complete.  As a bonus, some evolutionary feet were added so the fish can properly stand for viewing.

IMG_0150


Top fish – before bisque firing


Bottom fish – after bisque firing


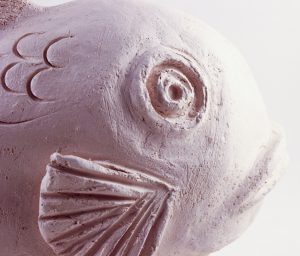
bisqued_fish_detail


Detail – after bisque firing


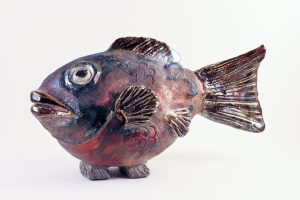
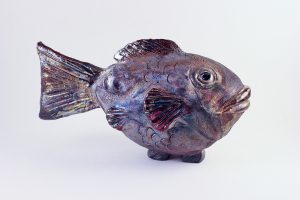
Lastly, the glazes were applied – underglaze for the eyes (covered with clear glaze and a coat of wax), followed by Raku glazes —  Matte Blue (body) and Shiny Abalone (accents). Raku fired in a gas kiln to 1800+ degrees, and cooled in a bucket with sawdust & crumpled newsprint.  The first completed sculptured fish ended up with unique coloring which varies on either side.

raku_fish_side2 raku_fish_side

Review of 2015 Thus Far

posted in: Blog, General, Uncategorized | 0

In the 1st part of 2015, while my house was being remodeled, I virtually lived in my ceramics studio. That is, I moved my kitchen table & chairs, refrigerator, microwave, computer, etc. into the Studio, and the Studio is where I did all my cooking, ablutions/make-up, paperwork, etc.  At the end of each day, I went back into my torn-up house to watch TV and sleep. This routine was not very conducive to making ceramics.

However, I did manage to create a Legalize Pottery Shop on Etsy. To visit, please click on the link!
Etsy Shop

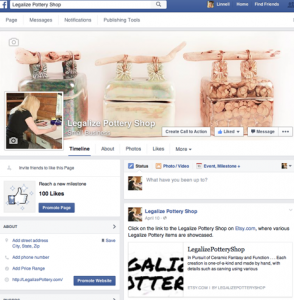
I also started a Legalize Pottery Shop page on Facebook. To visit, please click on the link!
Screenshot 2015-08-31 09.28.34

By April, some pieces made it into the kiln and came out fairly decent.

ceramics2015

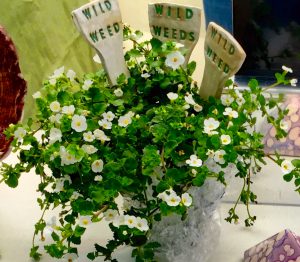
For a Pop-Up Sale in early June, I got the idea to make a batch of Plant Stakes for Weeds — how appropriate for Legalize Pottery.

Image

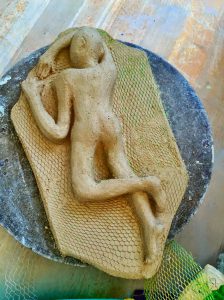
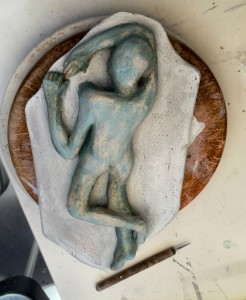
Then, I took a detour into Sculpture — and made a rudimentary human figure.
Image Image 1


Now, it’s back to the classroom — I’m enrolled at Palo Alto Art Center for the rest of the year, with an awesome instructor/ceramicist named Malia Landis.  In the next few months, I’ll be posting the results of that adventure.

Foray into Sculpture

posted in: Blog, General, Uncategorized | 0

Last month, to jump-start my creativity, I decided I should pursue ceramic sculpting (which I’ve been meaning to do for years now), and signed up for a class in San Francisco (http://dikarevart.com).

After looking through art books for inspiration, I opted to go for a prone skinny figure.  The teacher made the great suggestion of first making a tile for the sculpture to be lying on.

After the first week, it looked like this — ready to dry out and fired at Cone 04.Image


Returned after 2 weeks, and spent the next few hours sanding it down, applying copper oxide and turquoise underglaze, and finally coating the tile with watered-down glossy white glaze. Here’s what it looked like, ready for firing.  Image 1


It looks like, in spite of a sluggish start, this Summer may yet turn out to be full of creative accomplishments.