Trio of Bowls

posted in: Blog | 0

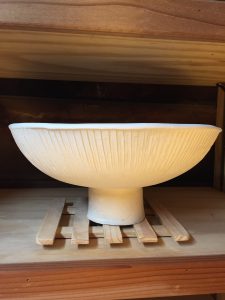
Here are the preliminary results of my quest to make symmetrical pedestal bowls using a slump mold.  They progressively grew in size and stature, with the bottom-most being comparatively big, middle bowl being bigger, and top-most being the biggest and tallest.


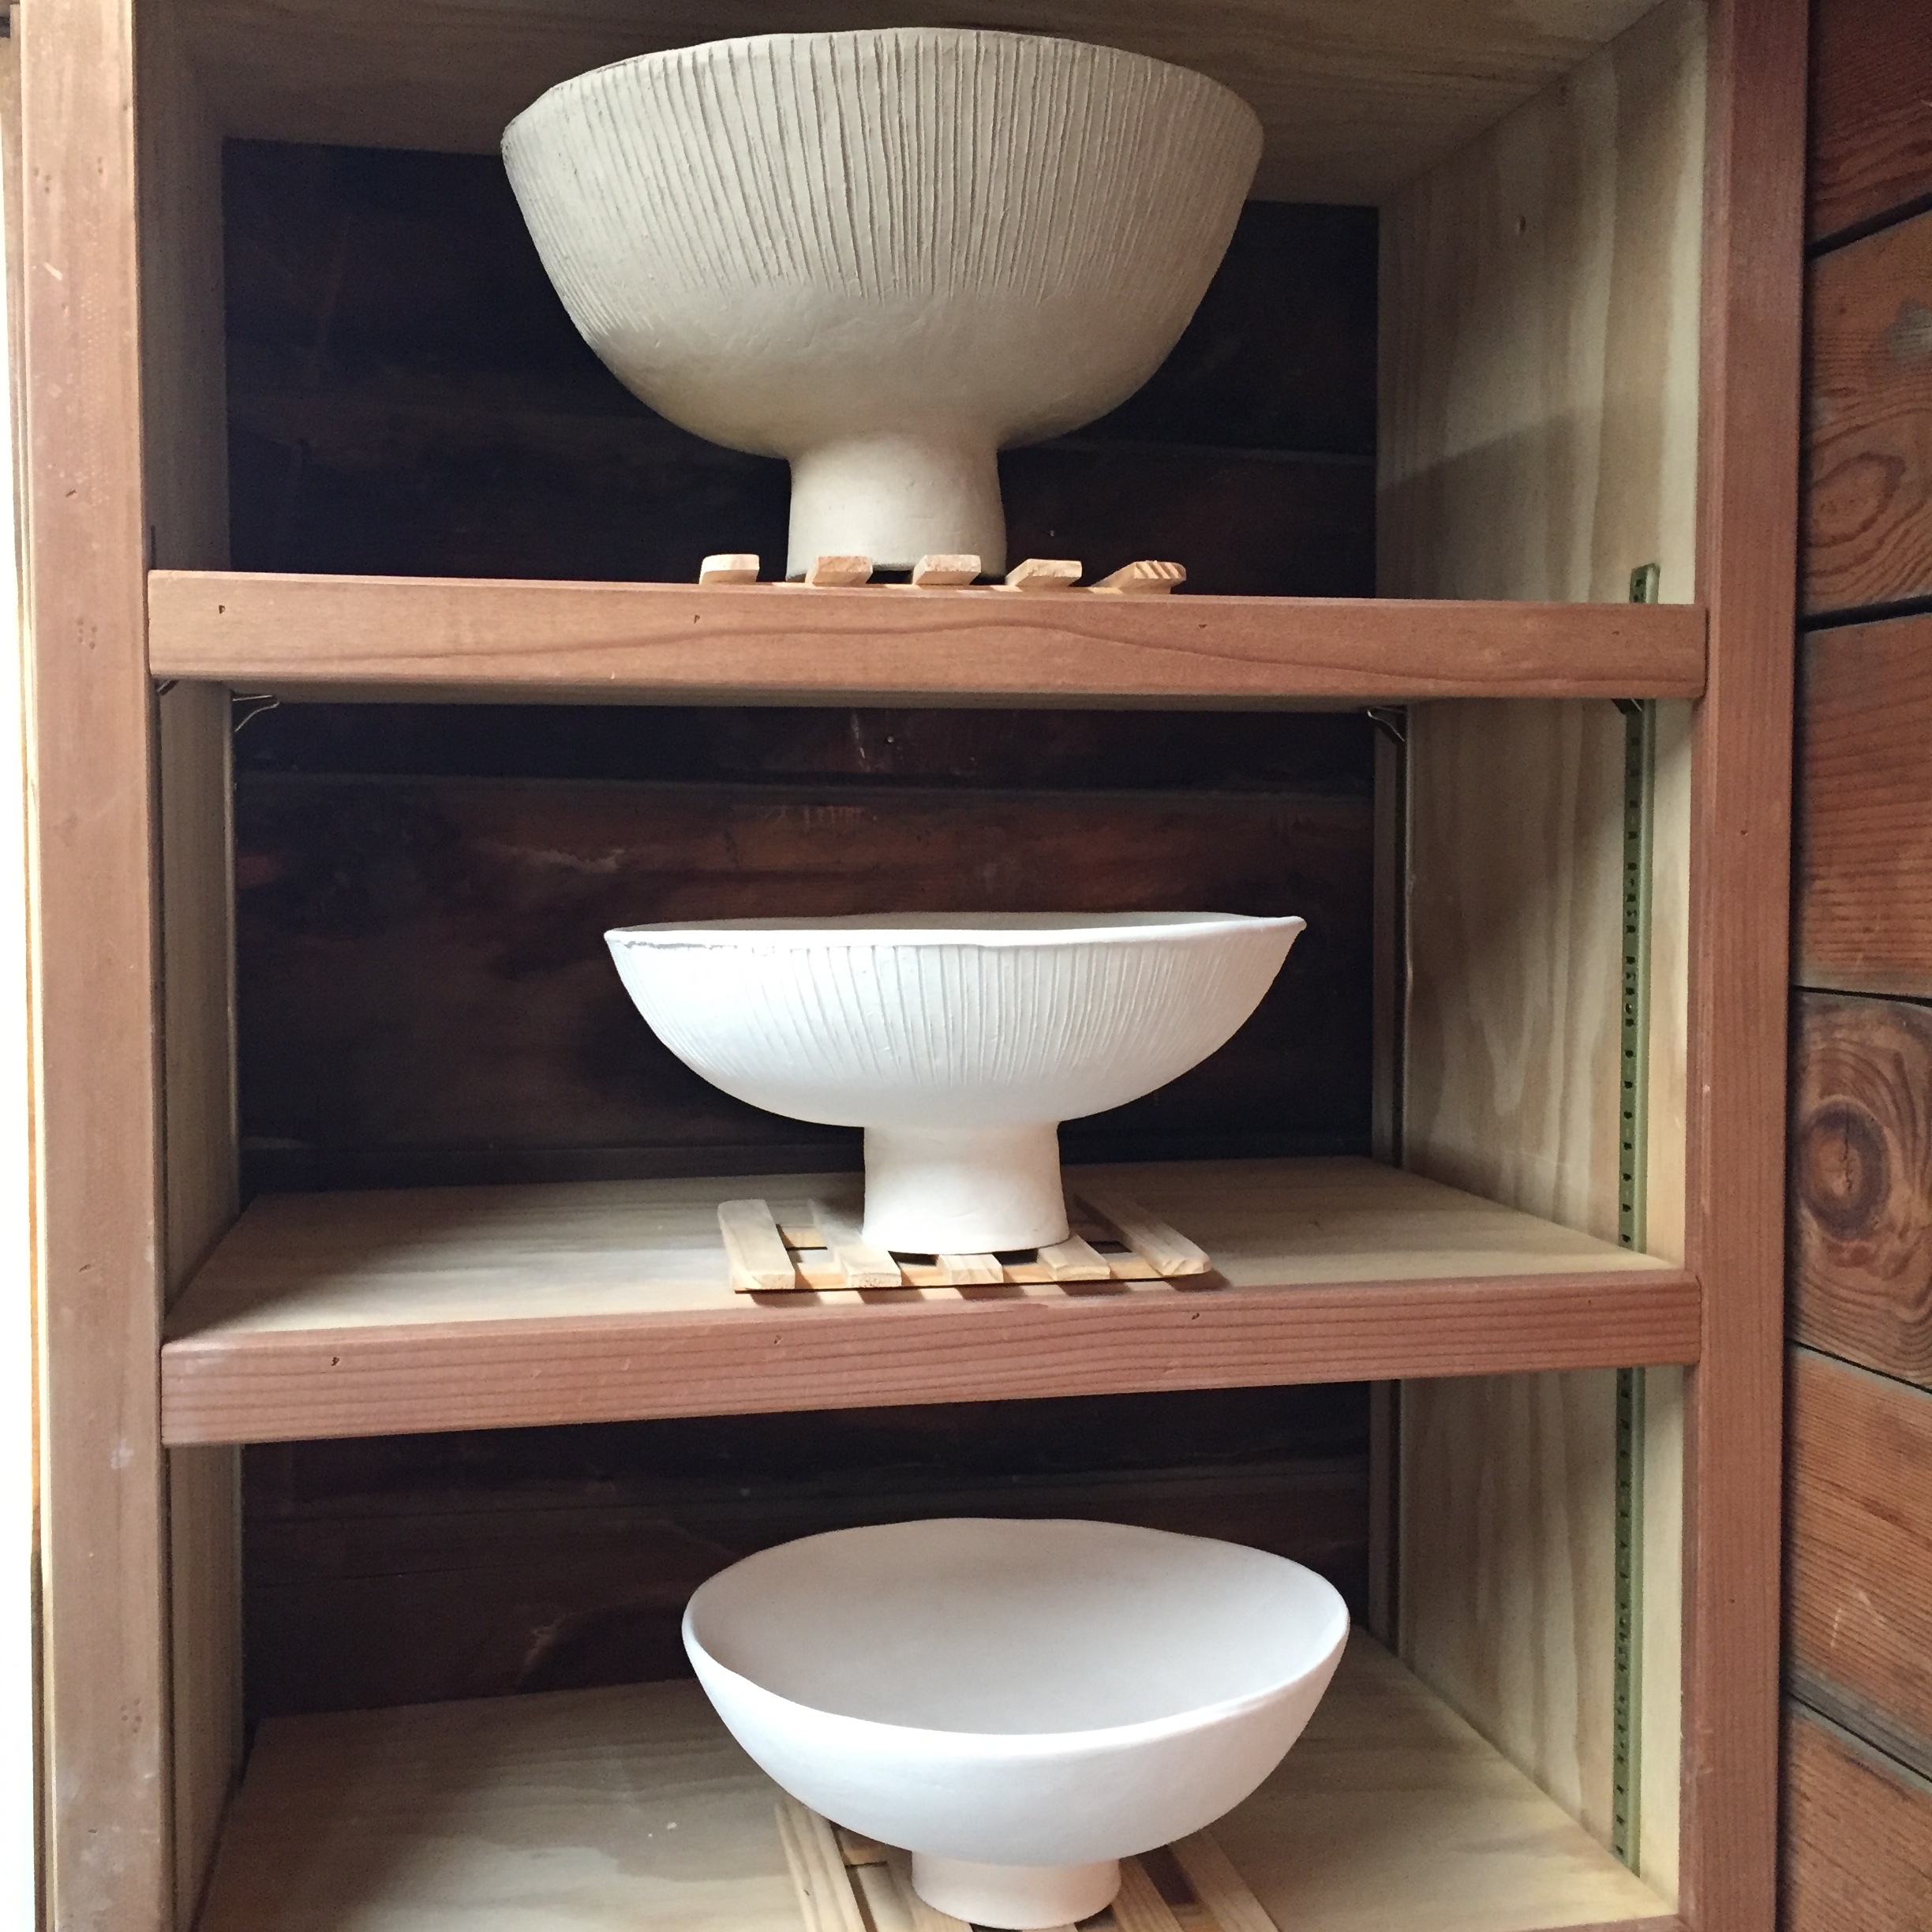
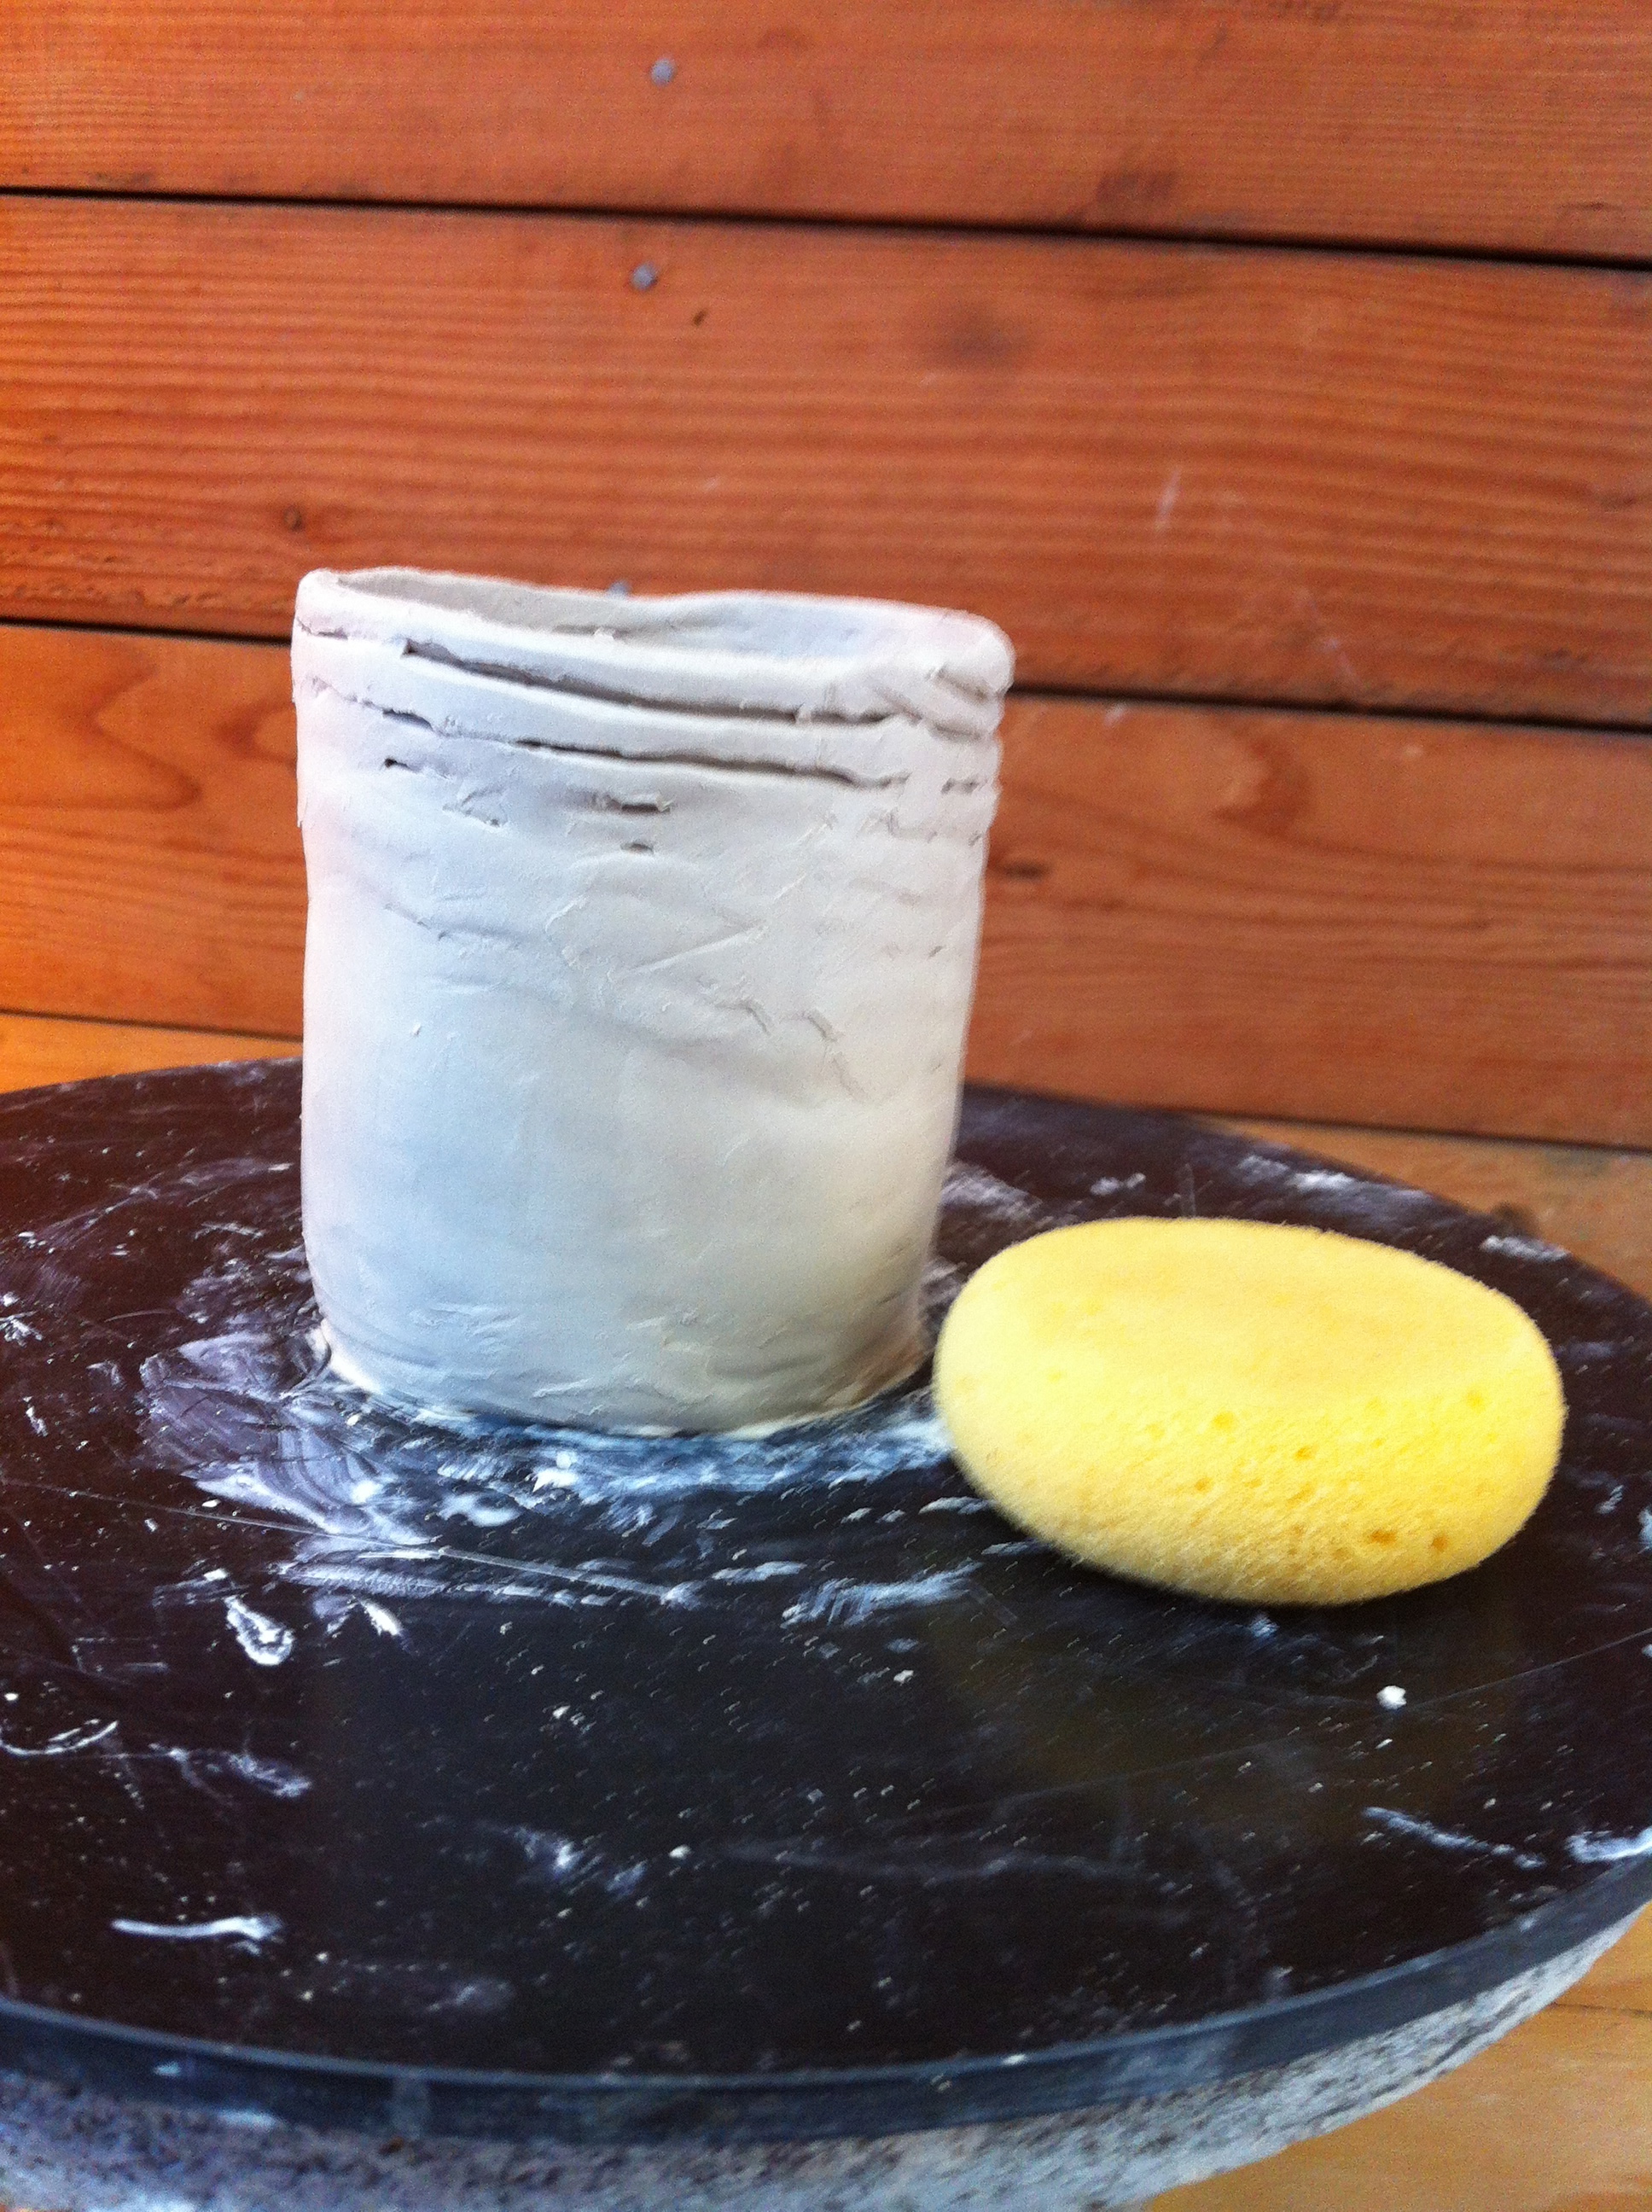
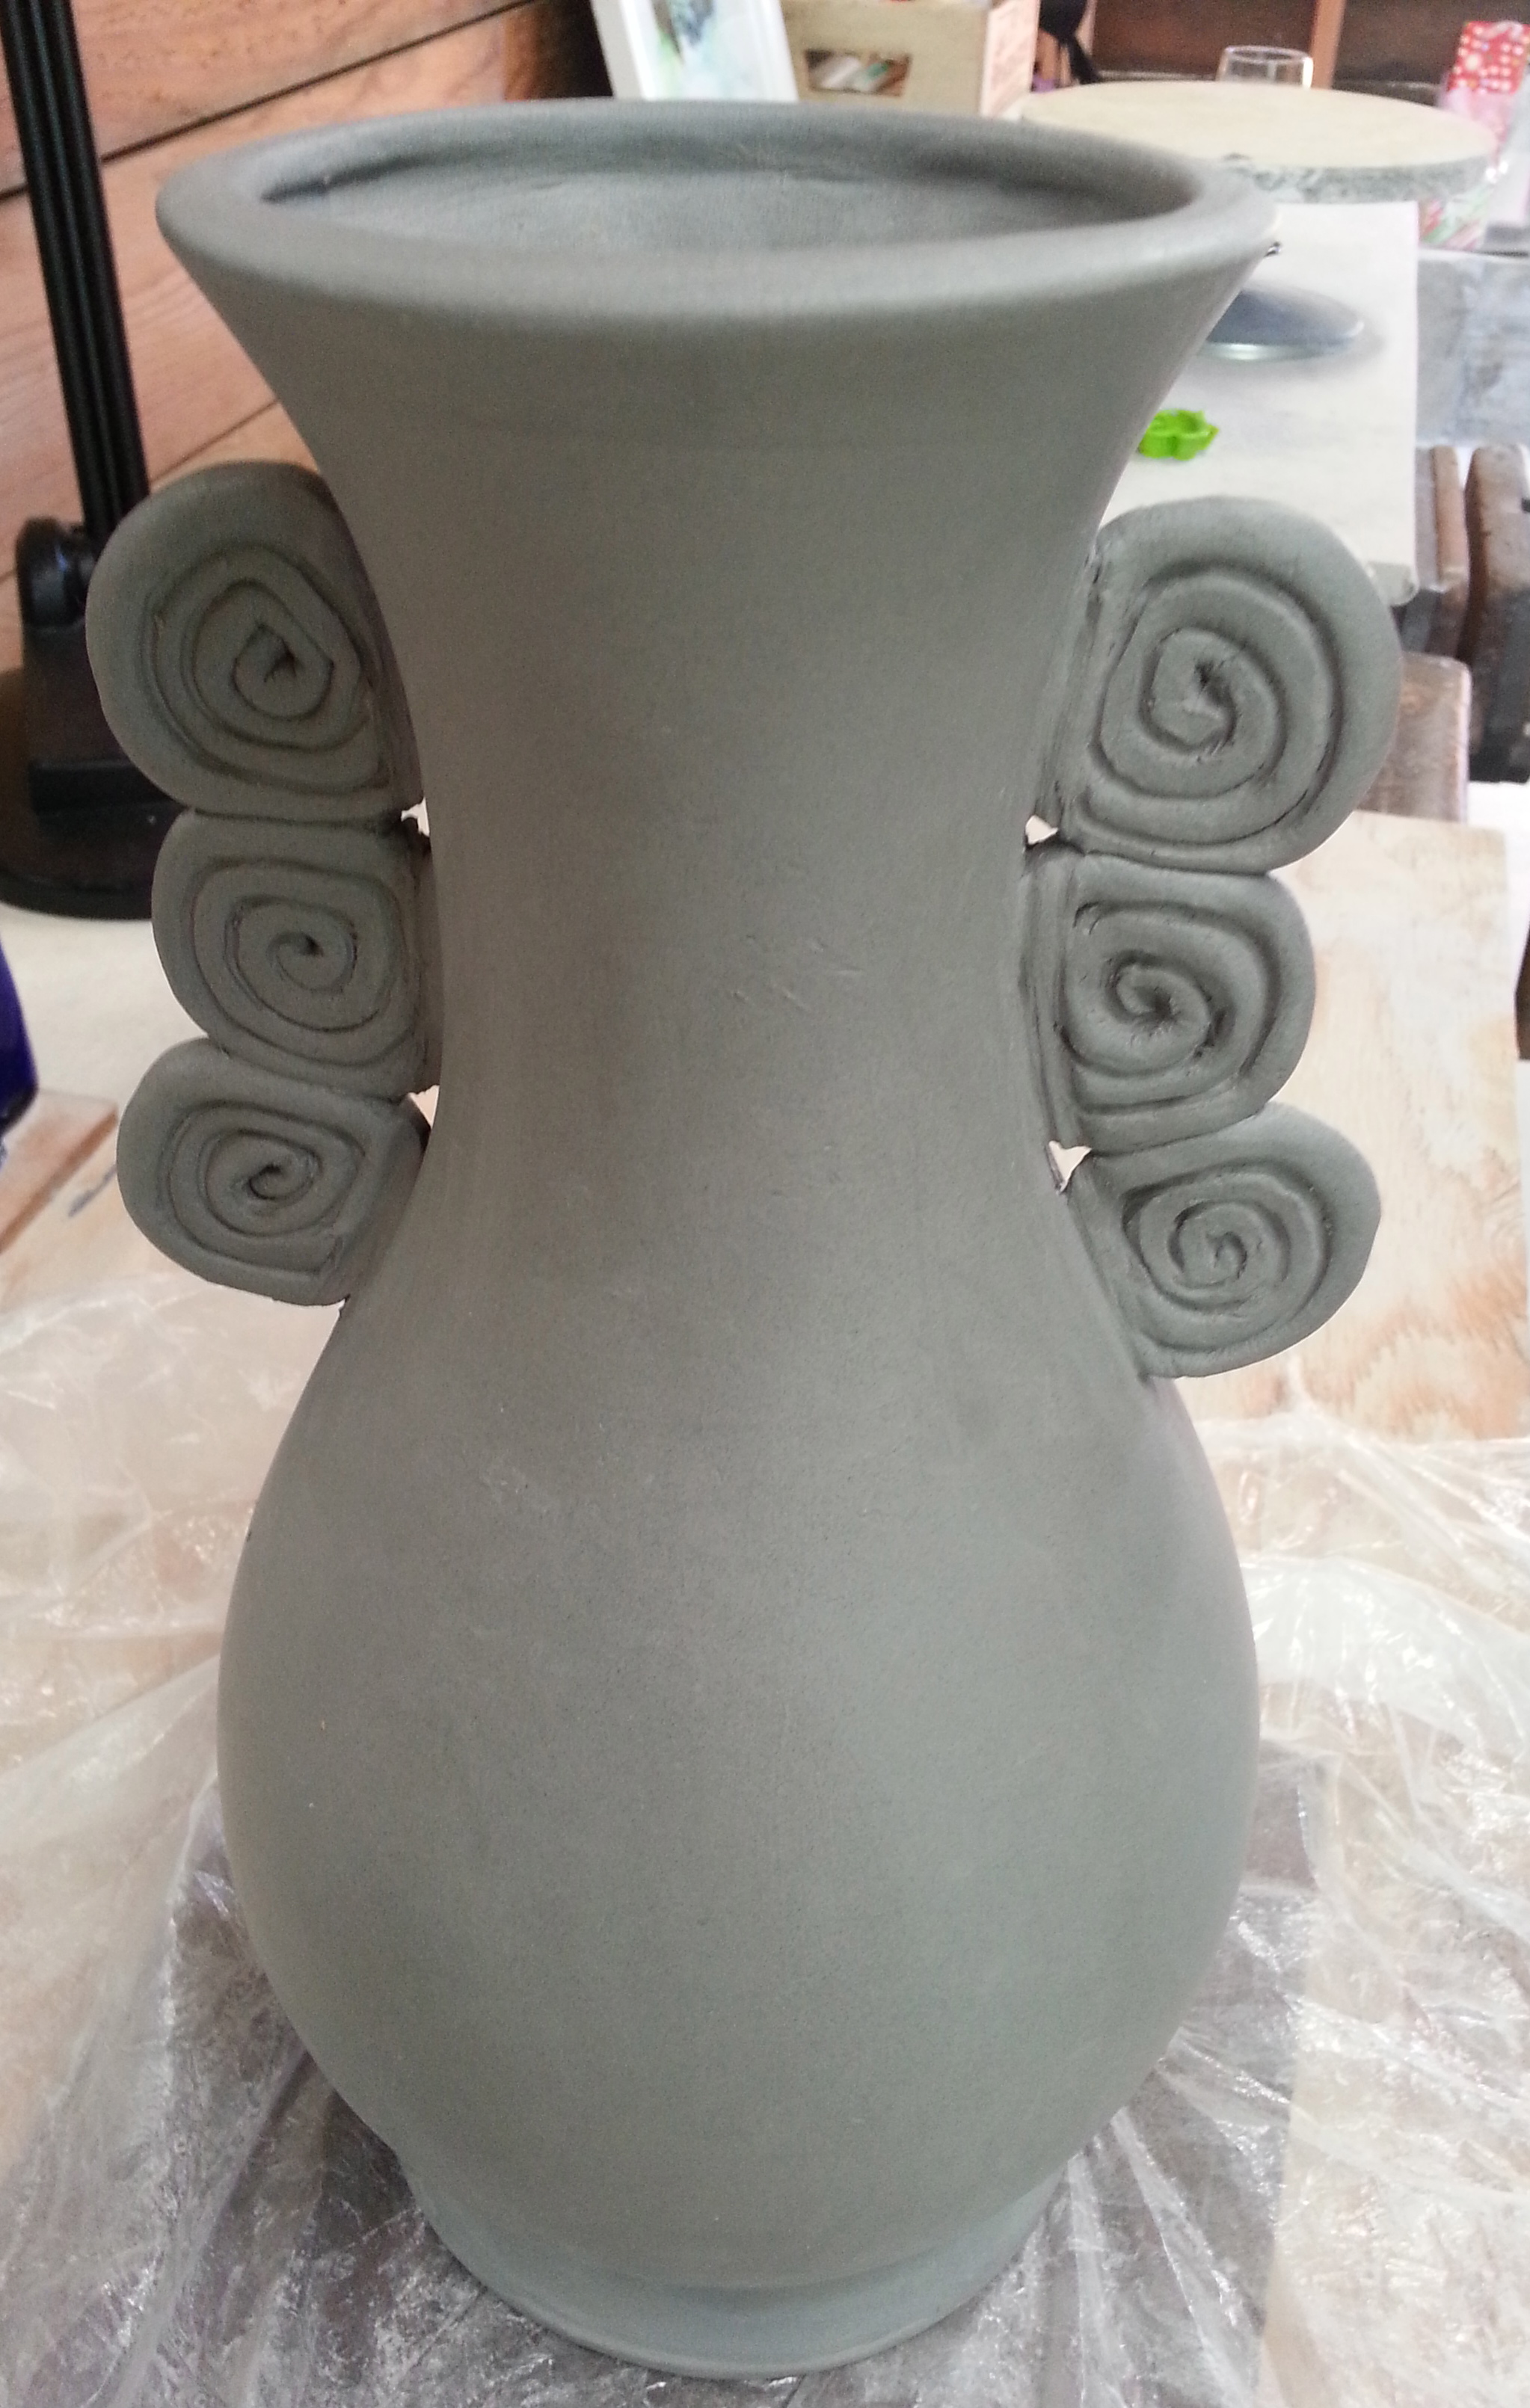
So far, the process has involved cutting large slabs into large circles, and pressing them into a plastic-wrapped mold, and gently beating the clay into submission.  Then, the insides required seemingly endless smoothing, and much effort was required to make the lip even from all angles.  The drying process was arduous, gradually getting the clay to the point where the bowls would maintain their shape so that I could flip them upside down onto a slightly smaller mold.  While the bowls were propped up from the inside, I was able to smooth the outsides and attach a pedestal.

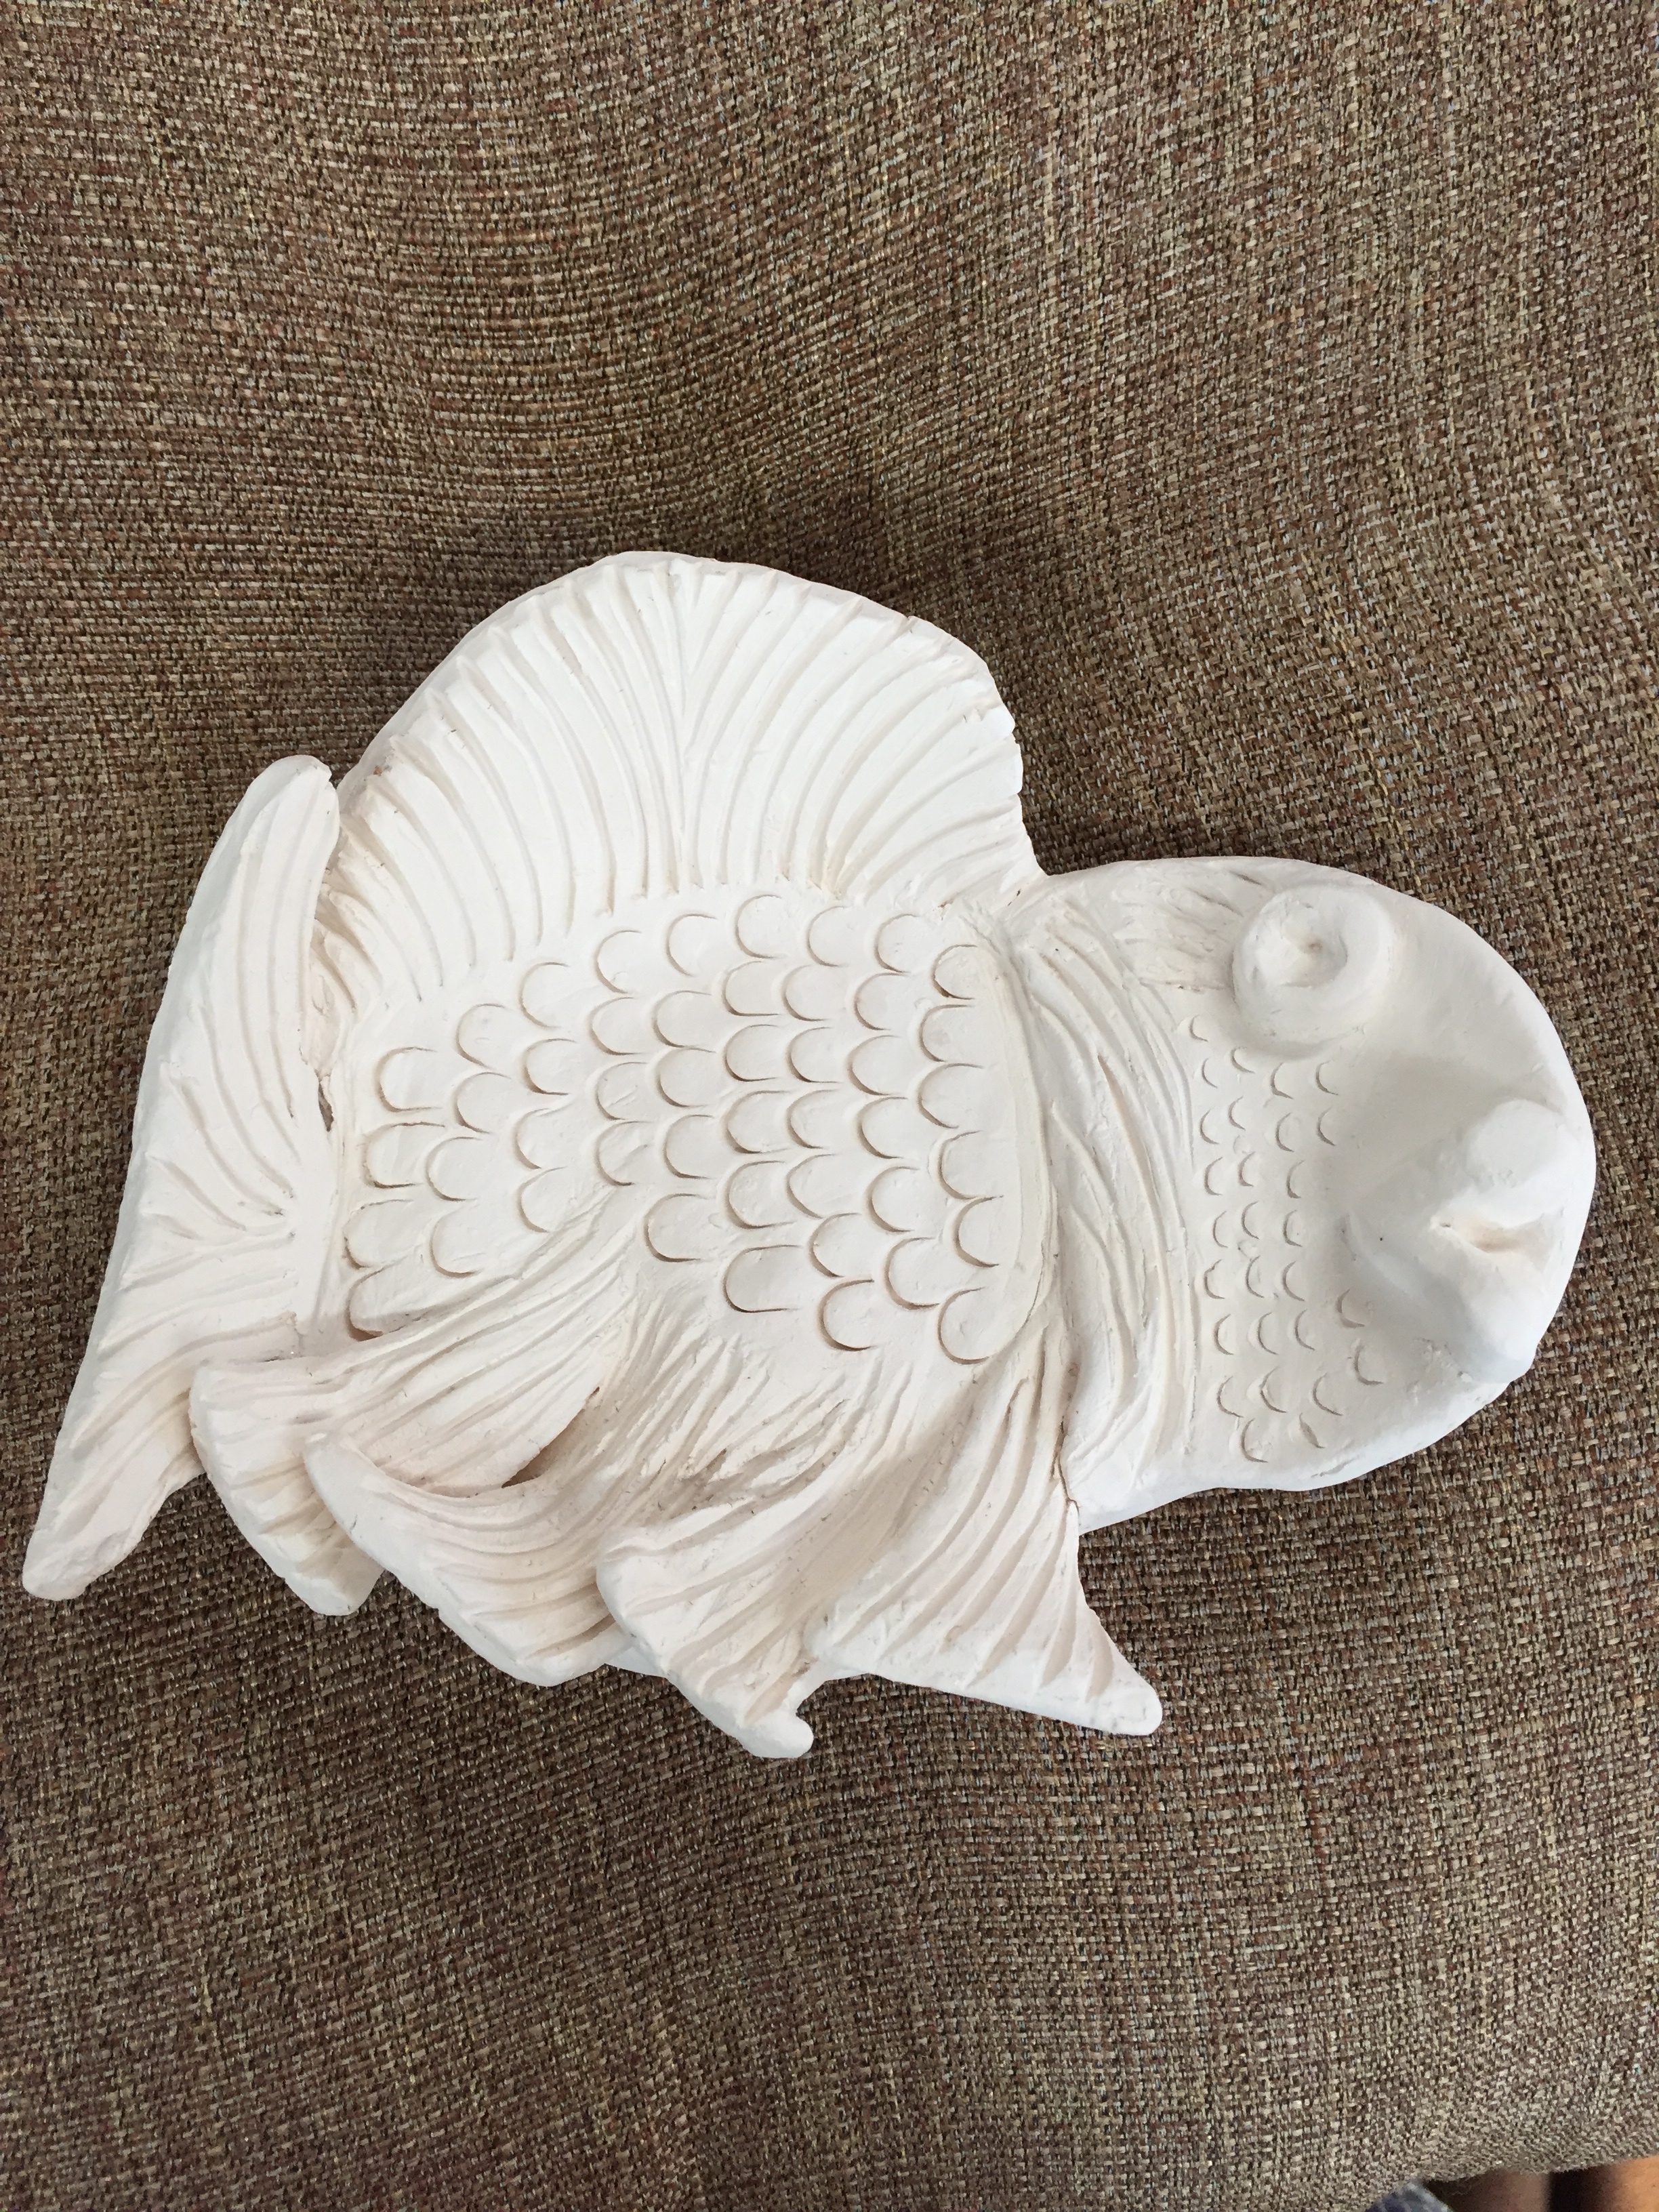
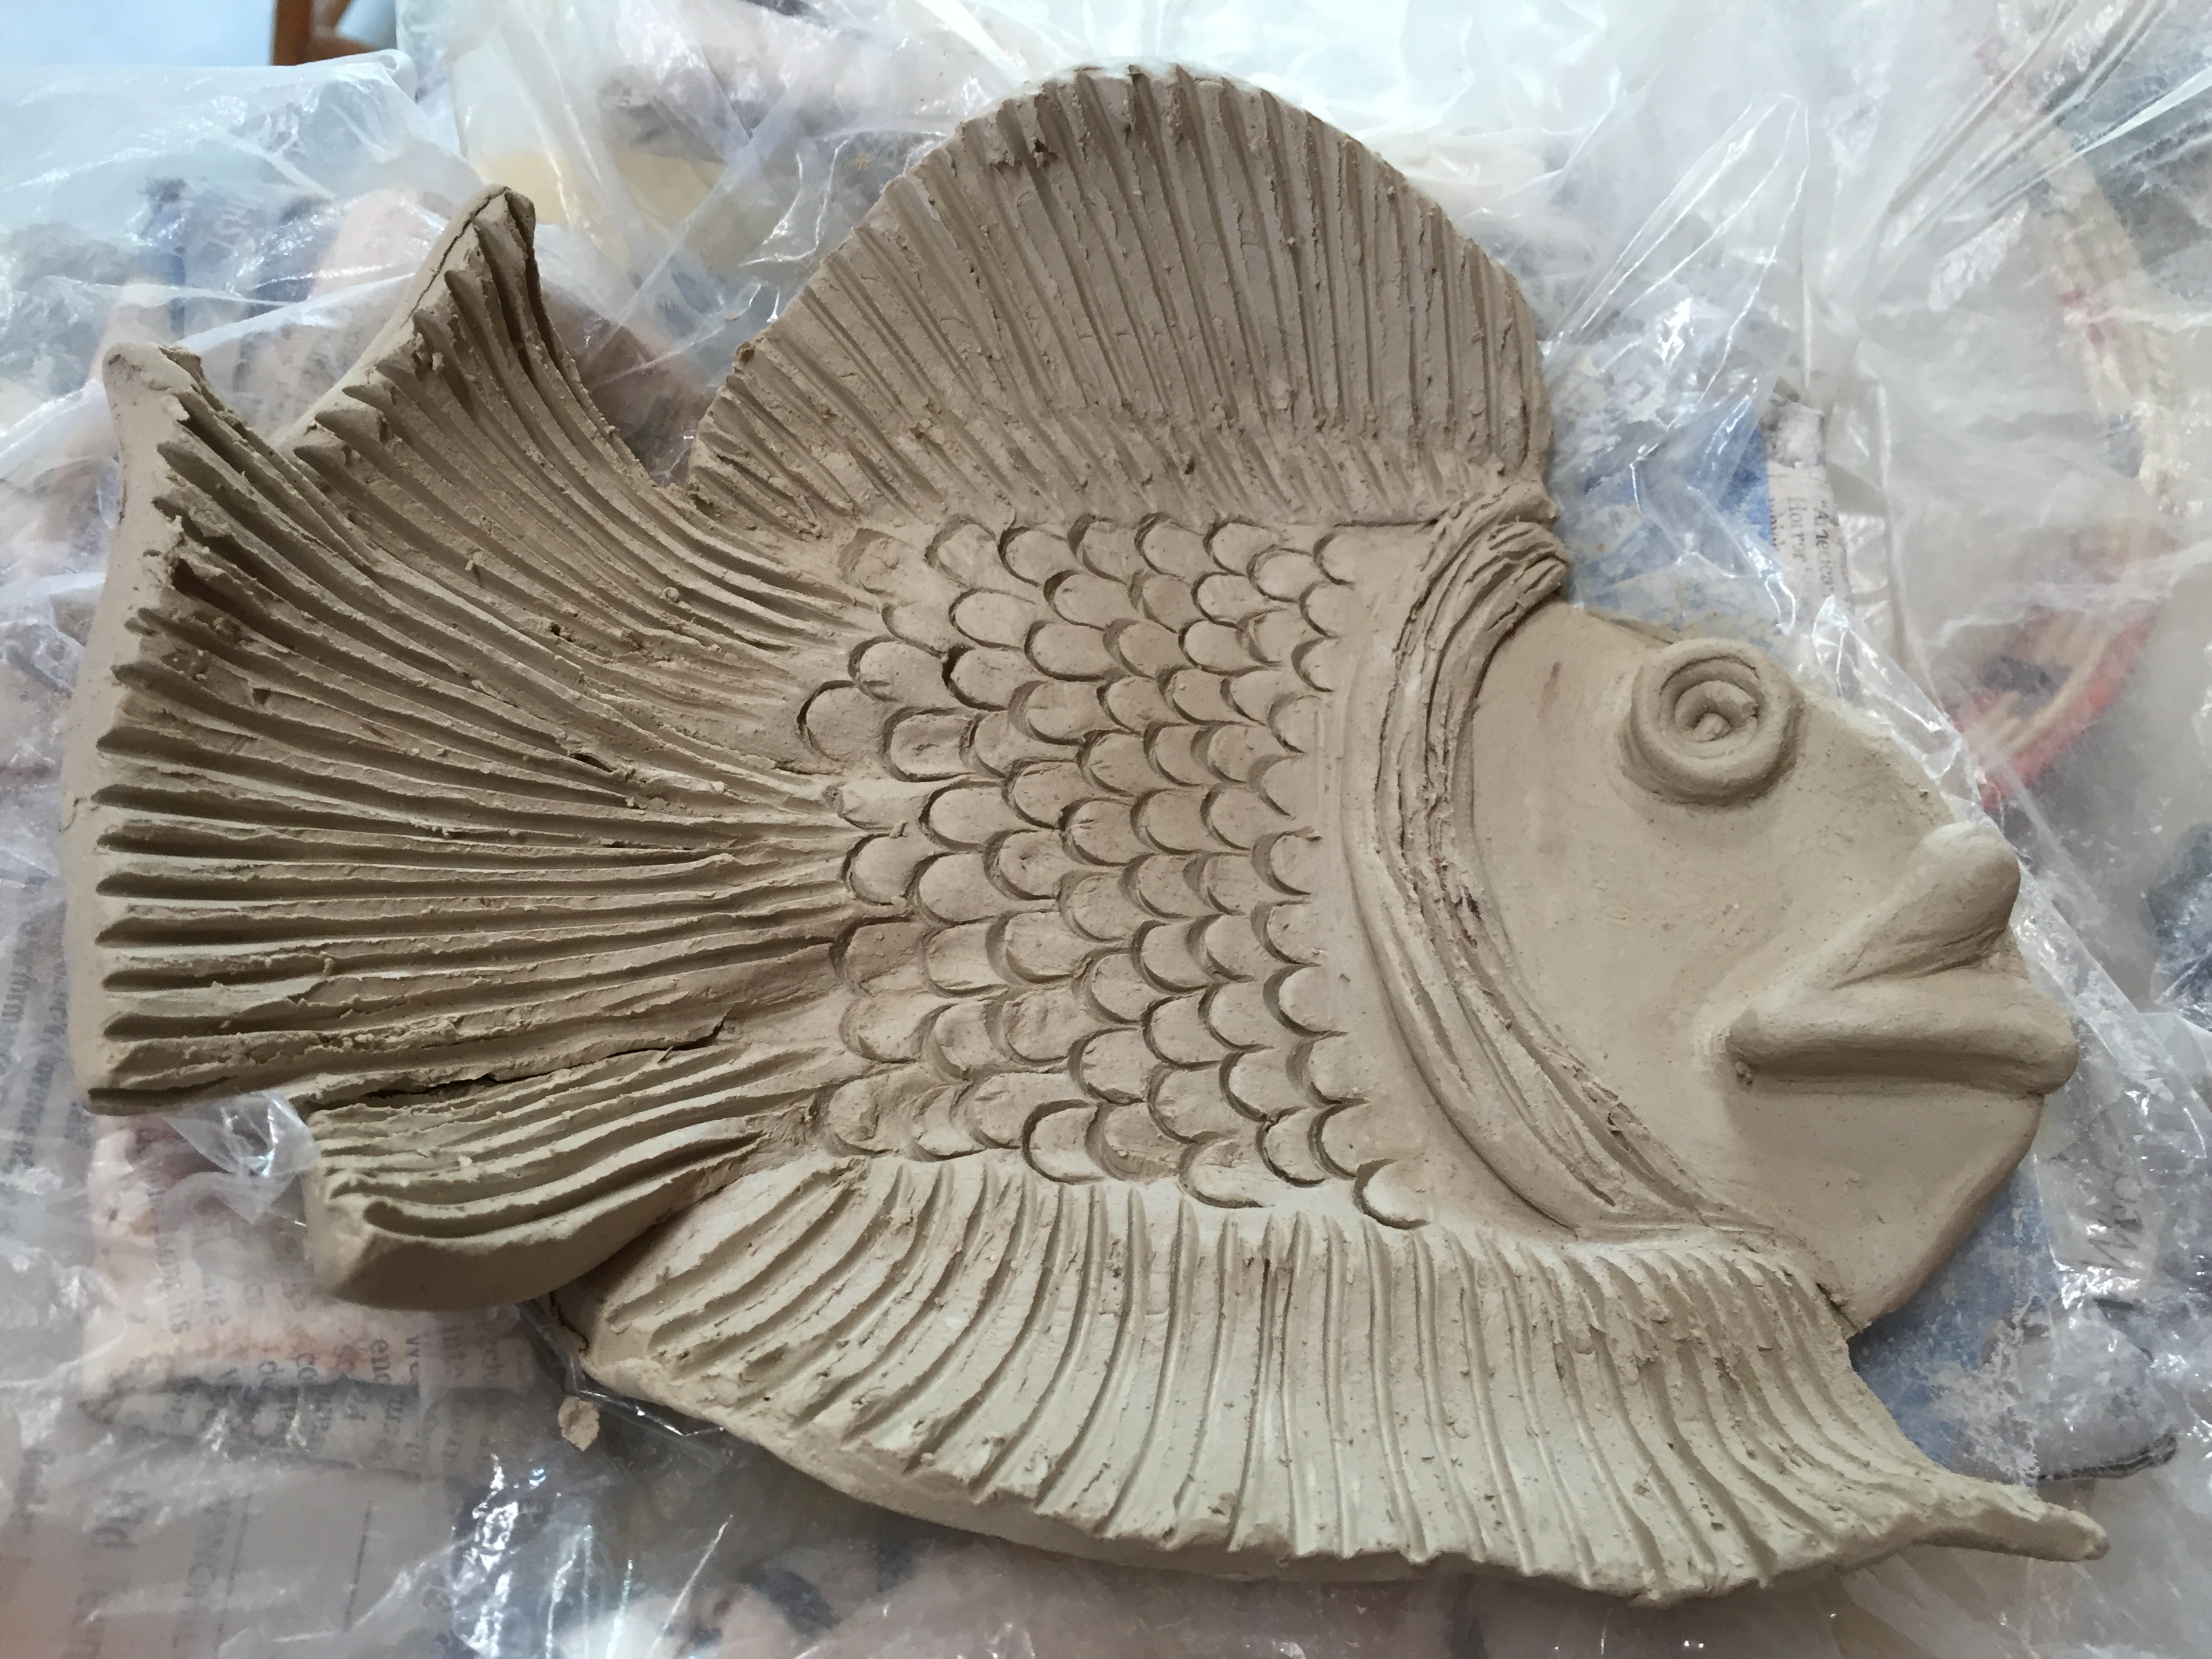
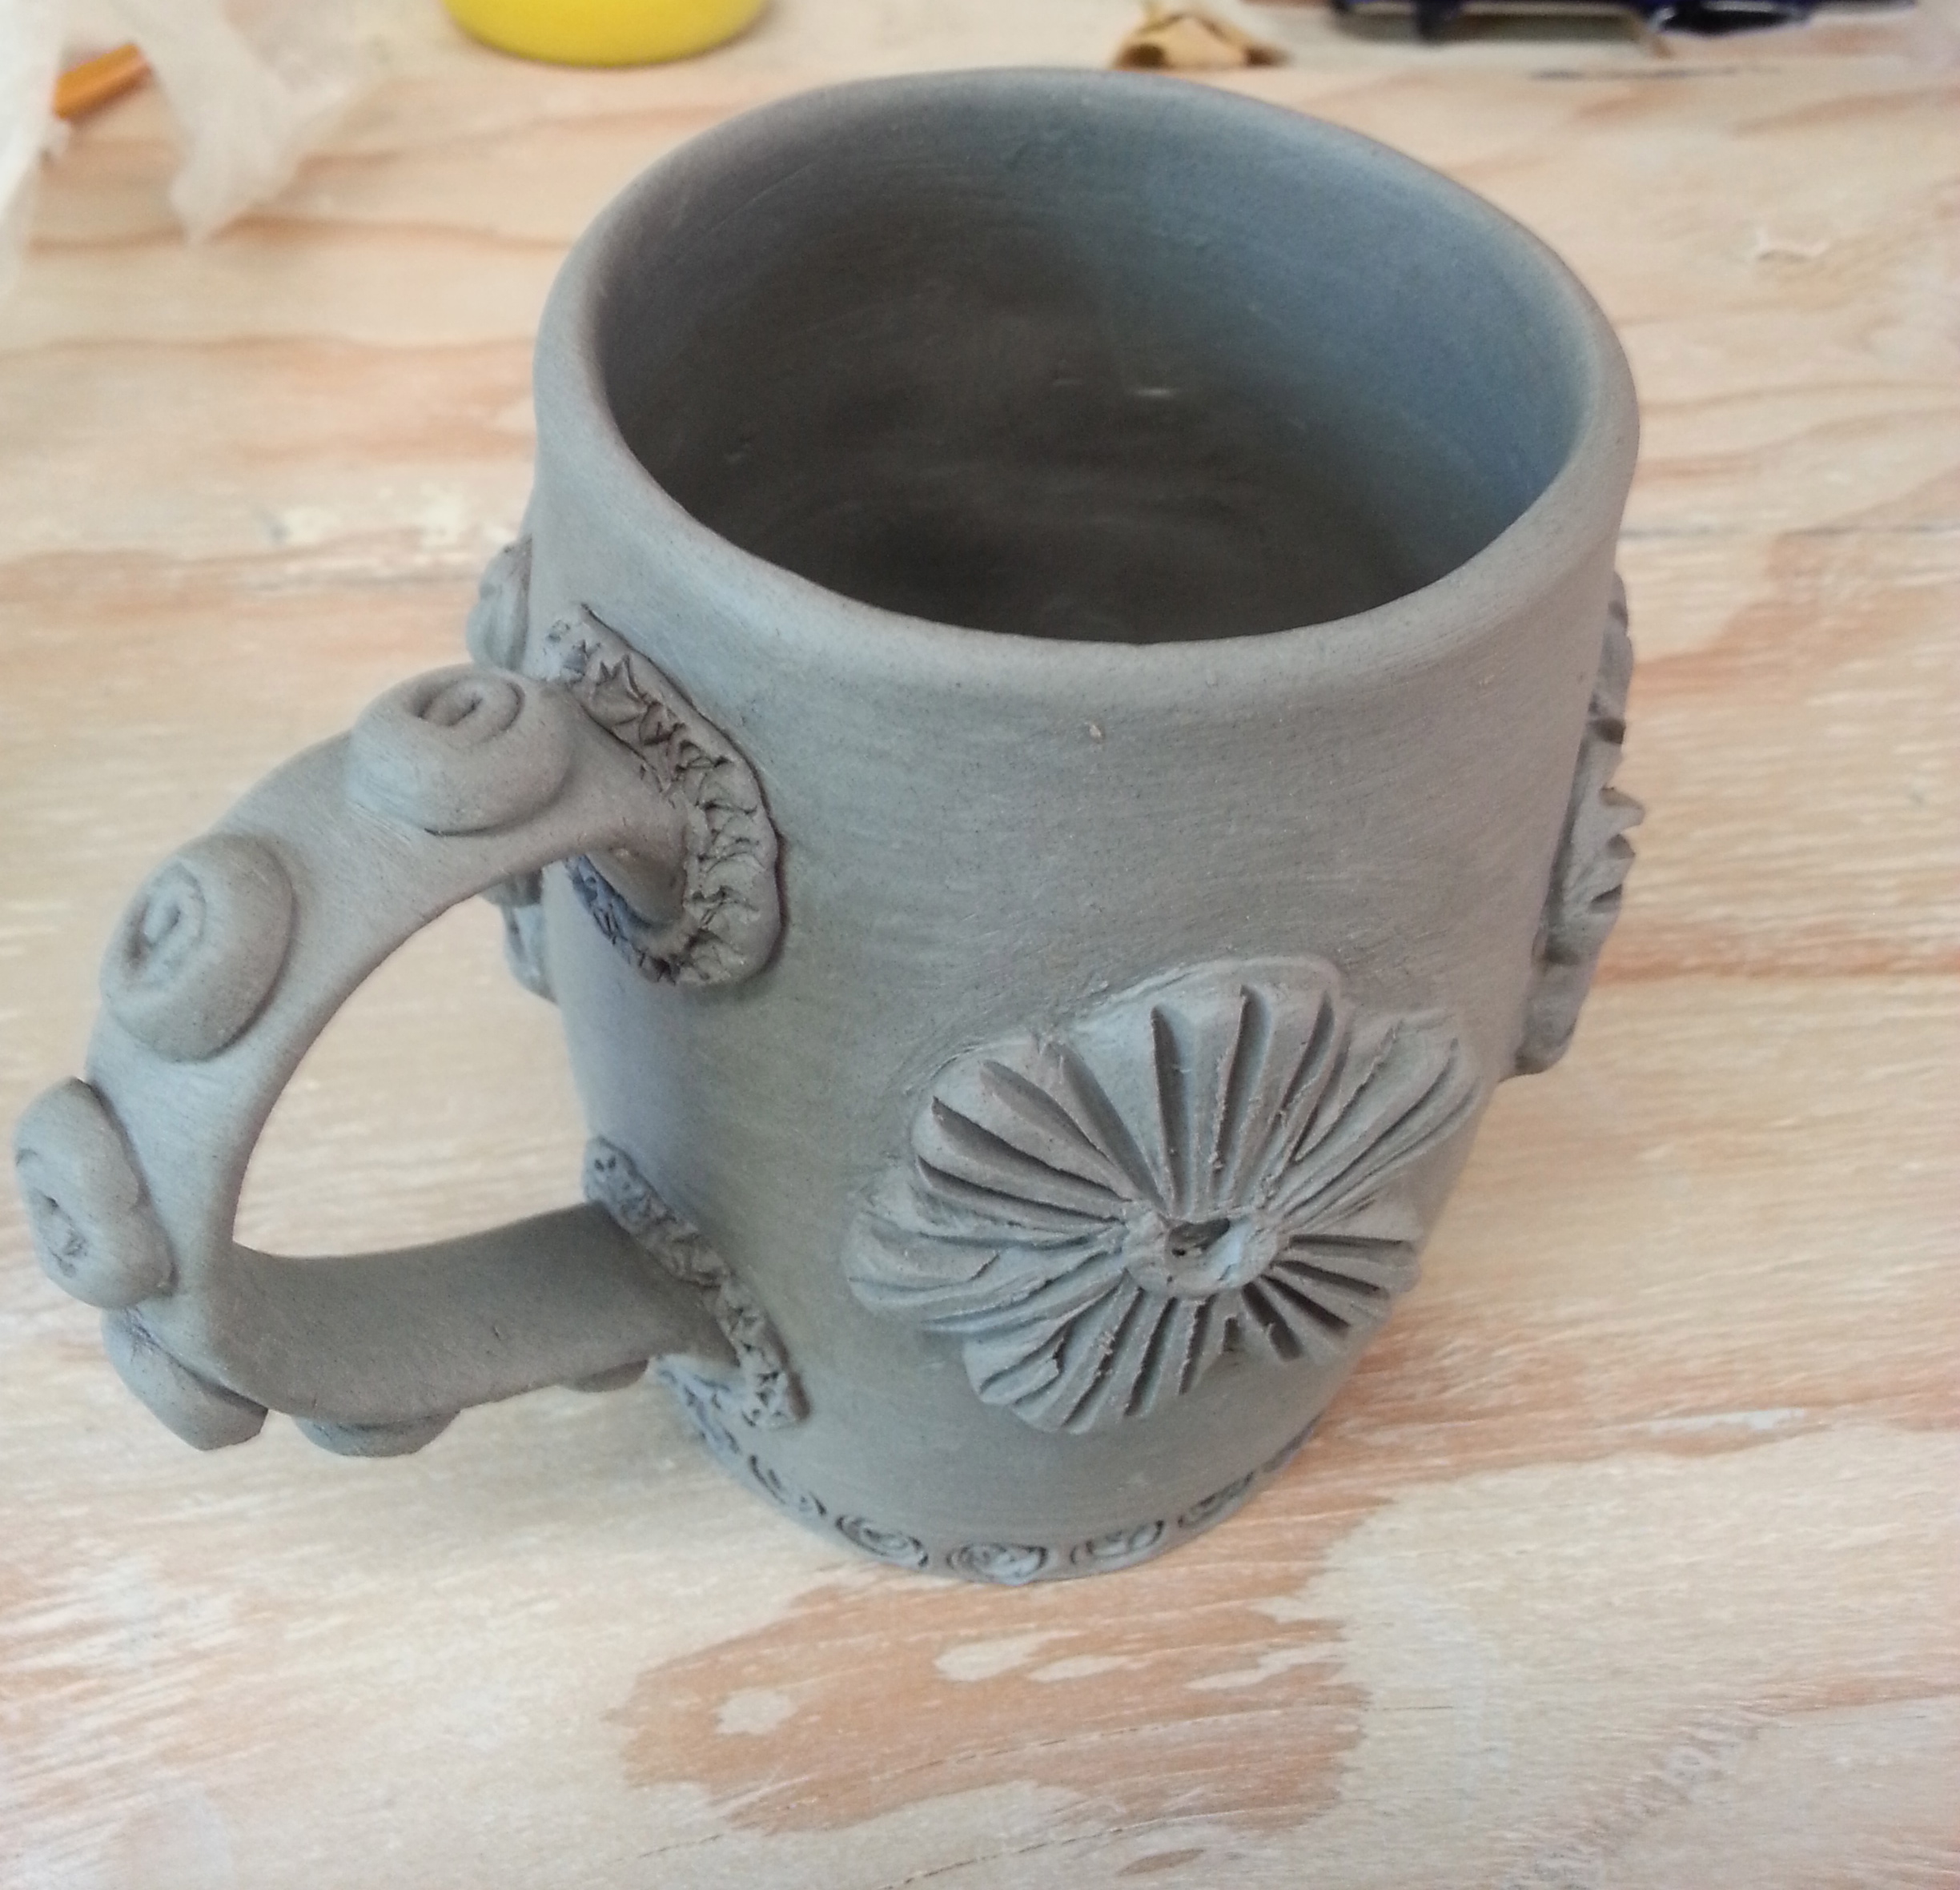
While I left the first bowl with smooth sides, I carved closely-aligned crevices into the outsides of the top 2 bowls.  This was done free-hand with a linoleum cutter — my favorite tool — which was loads of fun and turned out surprisingly well.  Next stop is the kiln for bisque-firing

Legalize Pottery’s School of Fish Continues to Grow

posted in: Blog, General | 0

I just can’t seem to stop creating fish ceramics.  Here’s the latest creation, still pretty fragile, in the process of hardening (greenware stage).   Notice I’m using ‘fish wrap’ to cradle the piece while it is drying.

img_0571

Below is a smaller fish which just survived bisque firing, and now ready for glazing.

Legalize Pottery’s 4th Anniversary

posted in: Blog, General | 1

Summer 2016 marks the 4th year of my foray into pottery. Here’s the first picture of my initial effort (June 2012):

IMG_0120

Here’s my most recent project, currently in the drying-out stage:

IMG_0494

Along the way, there have been some disappointing results. I was advised early-on to smash up anything that turned out sub-par — we don’t want future archeologists to dig up 21st Century crap and declare that we were really, really lousy potters. Below is a photo of my latest landfill contribution. It was disappointing to accept that all the hours spent on this piece had resulted in something that was just plain awful, but it feels good to know that I will never have have to look at it again, reminding me of my shortcomings as a ceramicist.

IMG_4070

On a brighter note, the fish dishes that I started in mid-June (1st set of photos) are now completed and I am happy with how they turned out — especially the lipstick red lips (2nd set of photos).

lafitterina_ceramic_fish

large_green_fish_topsmall_green_fish_top


I also wanted to mention that lately I’ve been adding items to my Legalize Pottery Shop, on Etsy.com.  It would take a miracle to sell anything via that outlet, due to the millions of offerings that I’m competing with.   But I’m proud of my “storefront”, which is starting to look pretty decent.

unspecified

Feel the Summer Energy Rising

posted in: Blog | 0

This Summer has started out auspiciously — with a rare “Strawberry Moon.”  A full moon shone on Summer Solstice (June 20) — the longest day of the year.  Hasn’t happened since 1967, and we all know what a great year that was!   Won’t happen again until 2062 — pending intervening unknowns.

So, I’m trying to make Summer plans that are equal to this auspicious start, involving heretofore unknown feats involving ceramics.  I was inspired by attending “Open Studios” last month, in particular one artist who recently switched from 2D (painting) to 3D (ceramics) and was cranking out some amazing work.  Since then, I have begun some cranking out of my own:

Fish Dishes — each one unique . . .

IMG_0387 IMG_0385


Shallow Serving Bowls — with enough breadth (11”) to accommodate my propensity to carve carve carve.  The first pic reflects my favorite ceramic subject which is fish.  The second pic reflects another of my favorite things, words. The idea of carving words was inspired by an acquaintance who was spouting off about people really liking things (artwork) with sayings on them.  Plus, I was enamored with Ms. Bockle’s words in a recent MoveGirlGO post which I paraphrased . . .

IMG_0435IMG_0397


I’ve got loads more clay on hand to keep me busy for the rest of the Summer, and hopefully I’ll continue to “feel my energy rising.”

Square Plates Edged with Sgraffito

posted in: Blog, General | 0

I’m continuing to add sgraffito to some of my recent projects, including these two sets of square dessert plates.  On the 1st set of 4 plates, I applied 4 coats of jade underglaze and used sgraffito tools to incise a design of branches around the edge.  On the 2nd set of 4 plates, I applied 4 coats of black underglaze (4 coats) and increased the complexity of the carving.  These pictures were taken before firing (greenware stage).  The plates measure approx. 6″ x 6″, made of cone 10 stoneware.

IMG_0277IMG_0280

Vases Made with Slabs and Coils

posted in: Blog, Uncategorized | 0

Making bigger pieces by hand is made easier by the use of slabs (made with the slab roller) or building with coils.

Image 1Vase #1 is made from one large slab wrapped around a cylindrical form.  I plucked some interesting leaves from a tree in the courtyard just outside the Studio, and pressed them into the damp clay, and coated the outside with black slip.  The video clip below was made after bisque firing at Cone 08.

ImageVase #2 is made from fat (3/4″) extruded coils made with an extruder which I flattened slightly with a roller, making “slab coils.” Using slab coils sped up the process of building the sides of the forms, and also resulted in thinner (less clunky) walls of the vase.  I built two 7″ diameter bowl-like shapes and pressed them together to make a round shape, and added a neck and base using more slab coils.  I painted 3 coats of black underglaze around the belly of the vase, and let it dry to leather hard.  Then, I used the sgraffito technique to decorate the vase, scratching off the underglaze with a linoleum cutter, creating a contrasting pattern and texture, revealing the clay underneath.  The video clip below was made at the greenware stage.


Fish in 3D

posted in: Blog, Uncategorized | 0

I’ve made loads of Fish Dishes in the past, 22 at last count, and the Legalize Pottery site has a whole page devoted to Fishes.  But so far the fish have been two-dimensional.

large_green_fish_goldlips_platter_side


While functional, my Fish Dishes aren’t what fish are all about, so to speak.  Now I’ve started to make some three-dimensional fish — sculptural, decorative, more fish-like, with a whimsical flair.

The basic technique is to start with a pinch pot, close up the top, and use a paddle to beat it into shape (no fish were hurt or injured during this process).  With the time-consuming addition of eyes, lips, tail, fins, scales, the fish is complete.  As a bonus, some evolutionary feet were added so the fish can properly stand for viewing.

IMG_0150


Top fish – before bisque firing


Bottom fish – after bisque firing


bisqued_fish_detail


Detail – after bisque firing


Lastly, the glazes were applied – underglaze for the eyes (covered with clear glaze and a coat of wax), followed by Raku glazes —  Matte Blue (body) and Shiny Abalone (accents). Raku fired in a gas kiln to 1800+ degrees, and cooled in a bucket with sawdust & crumpled newsprint.  The first completed sculptured fish ended up with unique coloring which varies on either side.

raku_fish_side2 raku_fish_side

Foray into Sculpture

posted in: Blog, General, Uncategorized | 0

Last month, to jump-start my creativity, I decided I should pursue ceramic sculpting (which I’ve been meaning to do for years now), and signed up for a class in San Francisco (http://dikarevart.com).

After looking through art books for inspiration, I opted to go for a prone skinny figure.  The teacher made the great suggestion of first making a tile for the sculpture to be lying on.

After the first week, it looked like this — ready to dry out and fired at Cone 04.Image


Returned after 2 weeks, and spent the next few hours sanding it down, applying copper oxide and turquoise underglaze, and finally coating the tile with watered-down glossy white glaze. Here’s what it looked like, ready for firing.  Image 1


It looks like, in spite of a sluggish start, this Summer may yet turn out to be full of creative accomplishments.

Summer Projects

posted in: Blog, Images, Uncategorized | 0

As usual, I skipped the Summer Session of my ceramics class, and instead worked on my own. Also as usual, accomplishments fell short of the goal, and there are only a few finished pieces so far, and fewer still are worth sharing.

Fish Dish #18, per customer’s specifications . . .

Image
Plaque (reversible), wire hanger with beads . . .Image 1

Spindly-legged stand with fish carving, inlaid with colored glass particles . . .Image

I spent most of my time slip-casting and trying to alter the results into something unique. I acquired several different molds and 4 gallons of slip, and spent lots of time/effort making the pieces ‘artsy’ rather than ‘crafty’ BUT not quite there yet.

Pyramids embellished with fish . . .IMG_1819

Work in Progress . . .