The Evolution of Ceramic Woodland Insects

posted in: Blog, General | 0

Late May 2017 – On a sunny Sunday, I spied a shiny black beetle at the side of a path whilst hiking in the Heritage Grove Redwoods, La Honda, California.  I realized instantly that this bug would make a perfect model for a ceramic insect that I would coat with some recently-purchased Black Luster overglaze.

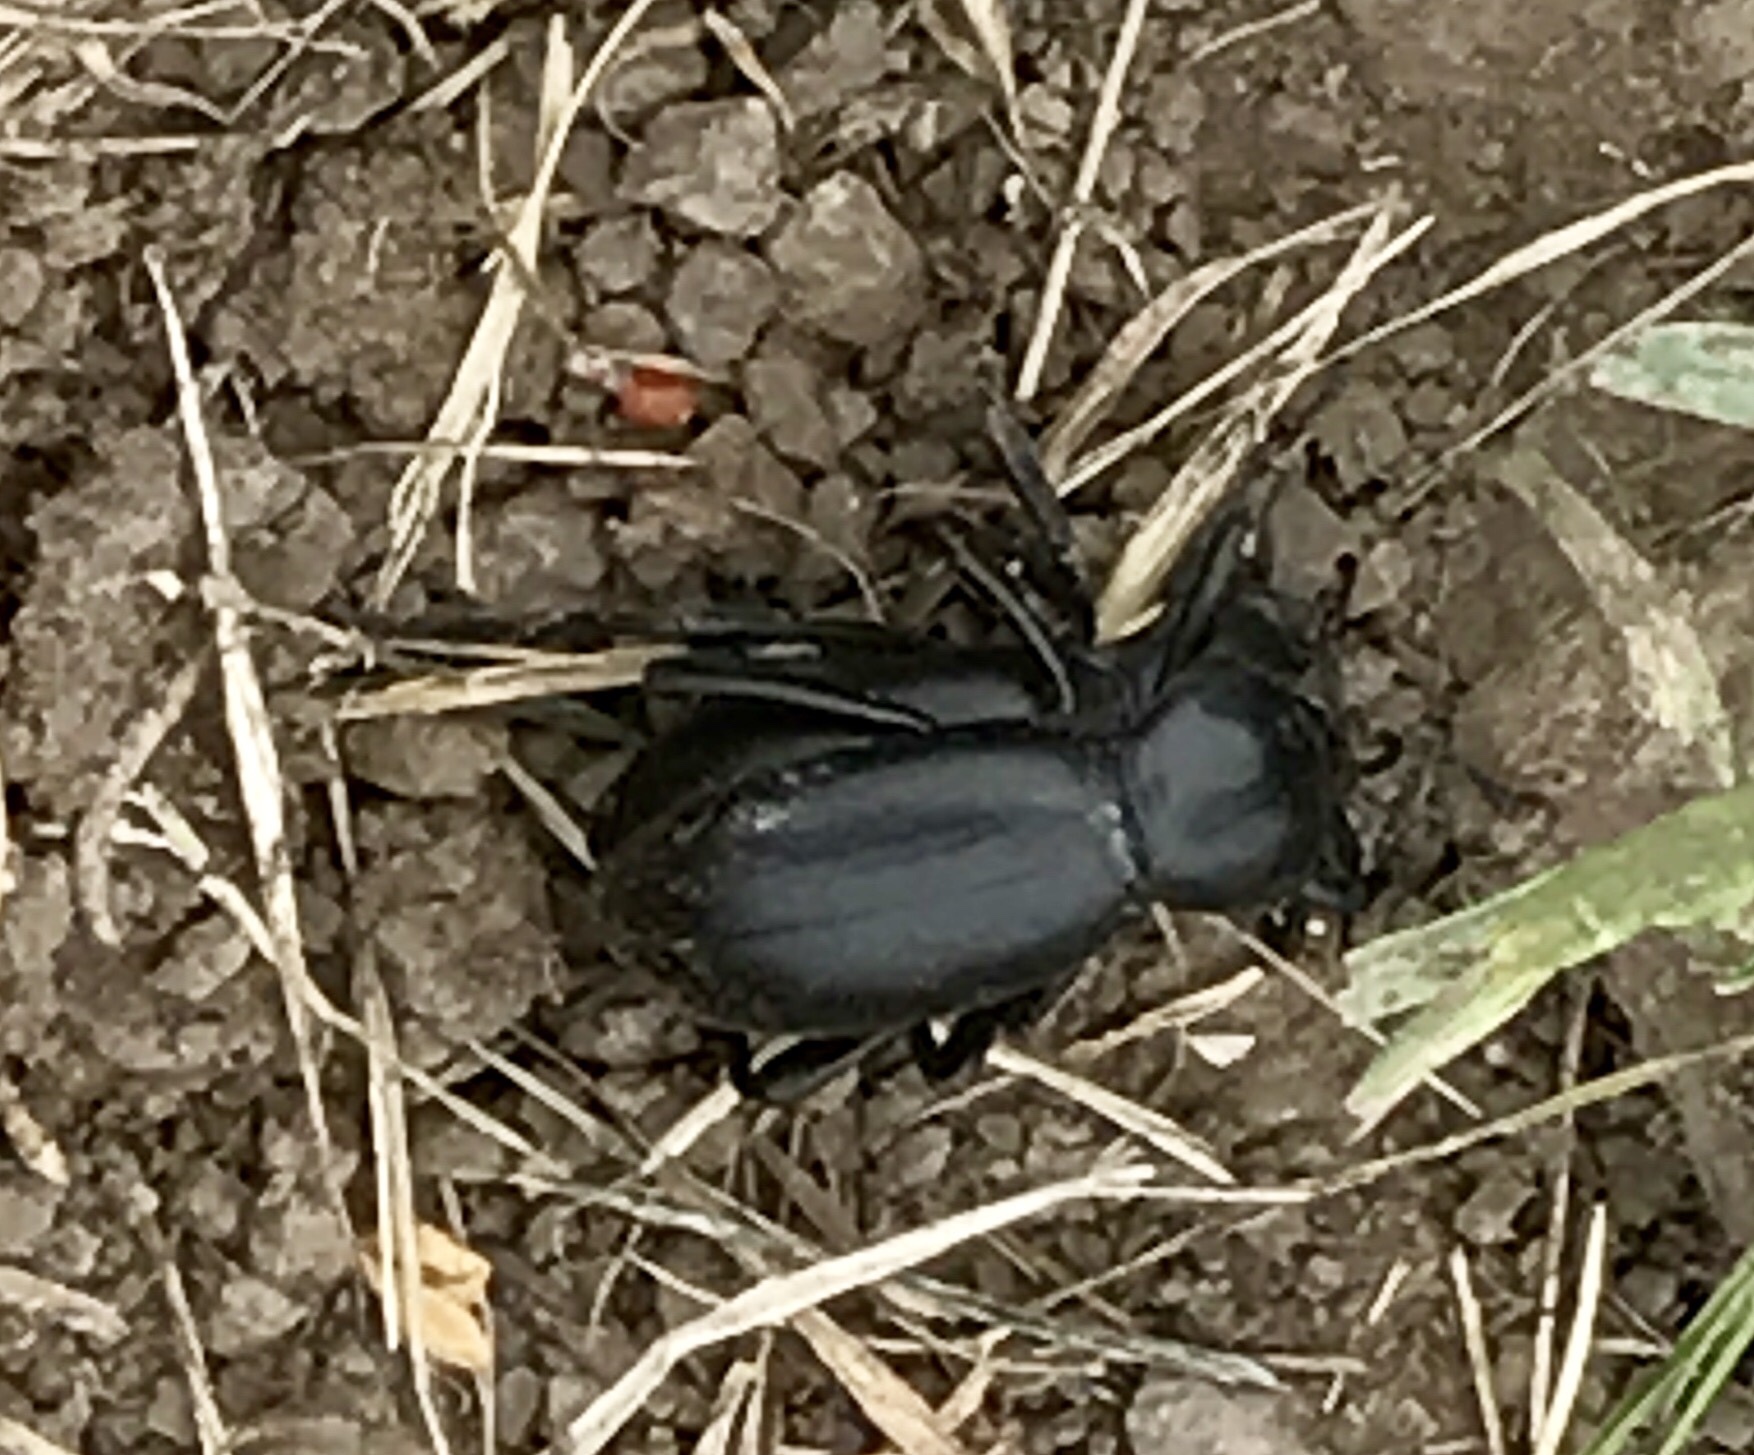
Luckily, my hiking partner had his iPhone and took this Photo.

Research revealed that this creature has the fantastic name of Darkling Beetle.

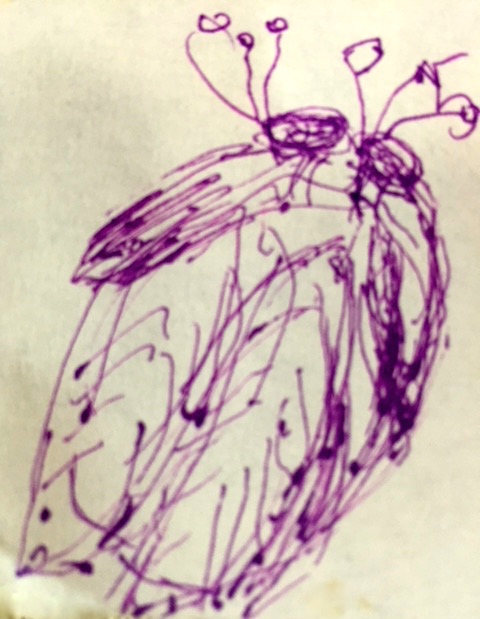
I sketched what I had in mind for making a ceramic bug.

My idea was to make antennae and legs from wire leftover from my hobby of making earrings, using wire-wrapping techniques learned back then.

The bugs would be mounted on driftwood collected from the beach earlier in the year after a gigantic storm.

Copper tacks from my late-father’s stash of hardware would be perfect for attaching the bugs to the driftwood.

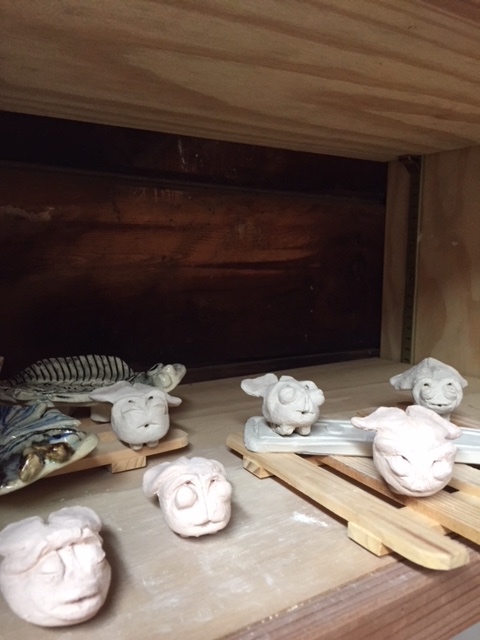
I hand-built 6 experimental bugs out of high-fire stoneware clay.  Each started as a closed pinch pot.  Different features were added, such as up-lifted flared wings, bugged eyes, mouth/lips.  I made protruding eyebrows and sled feet, with holes to accommodate the later addition of wire antennae and legs.

After the bugs dried, I applied various combinations of underglaze colors for highlighting different features.  All bugs survived the bisque firing.

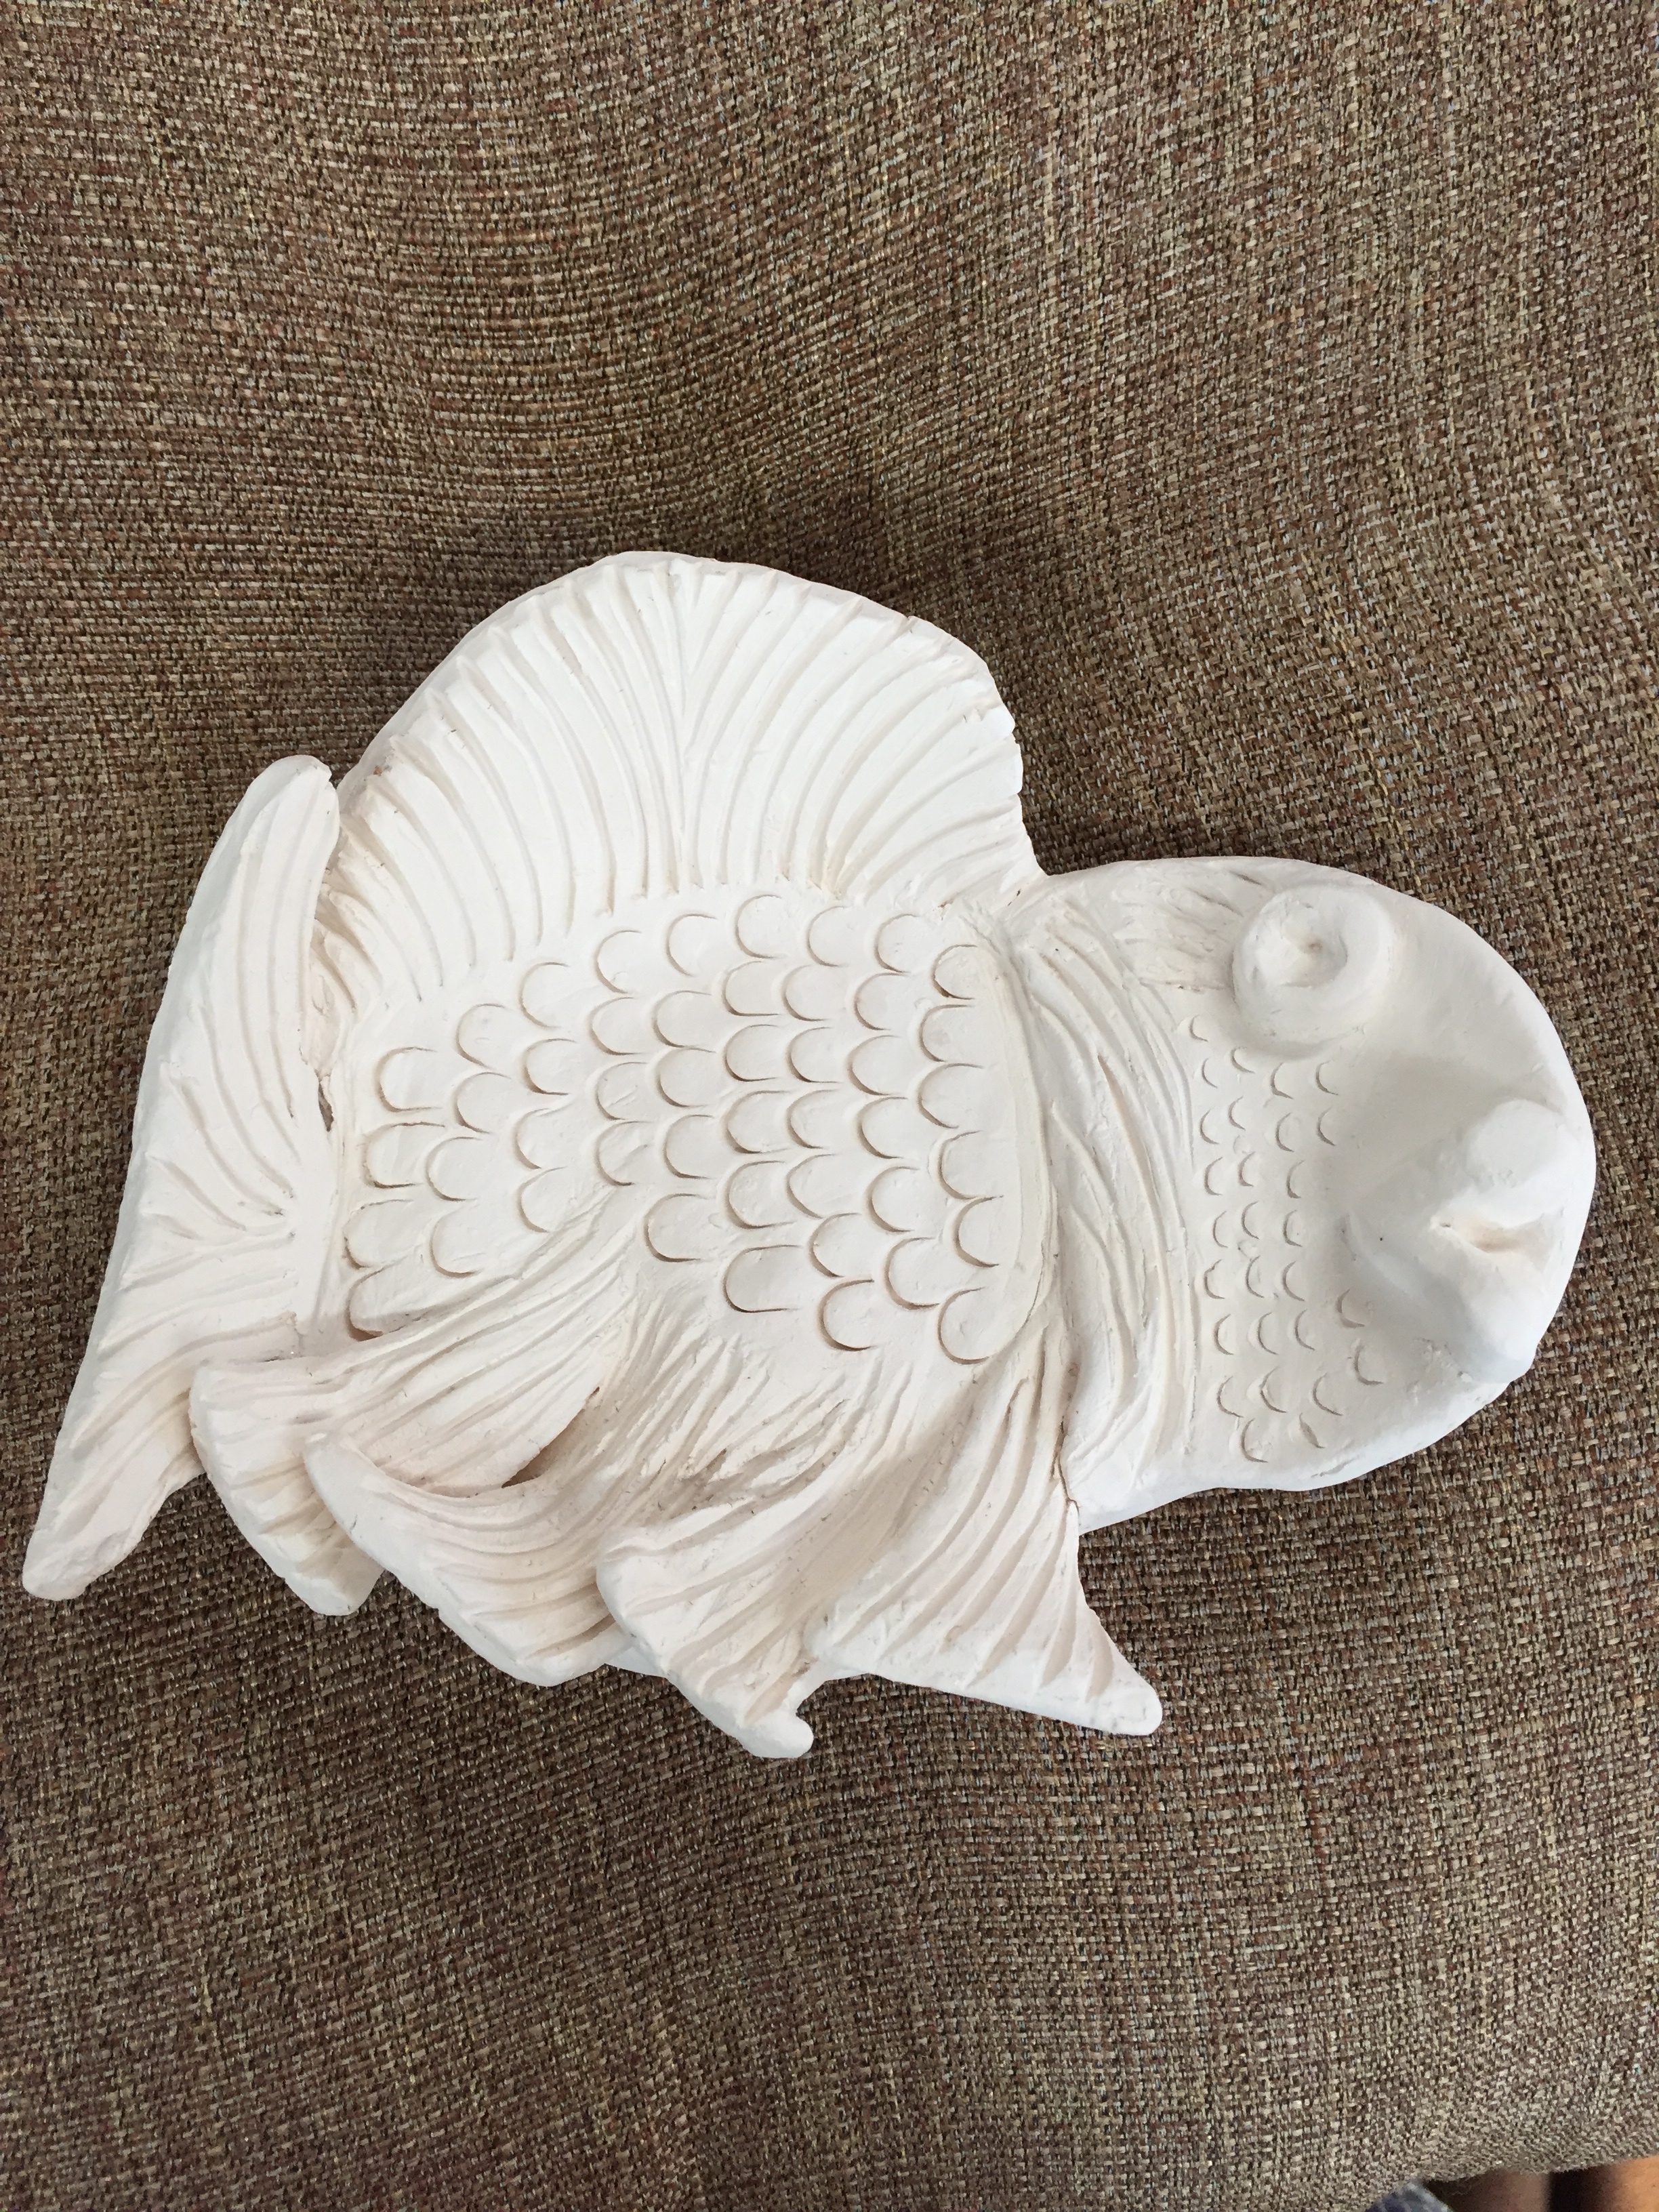
For glazing, I experimented with various glossy glazes, including Palladium (Silvery Black), Saturation Gold, Pansy Purple, and Transparent.

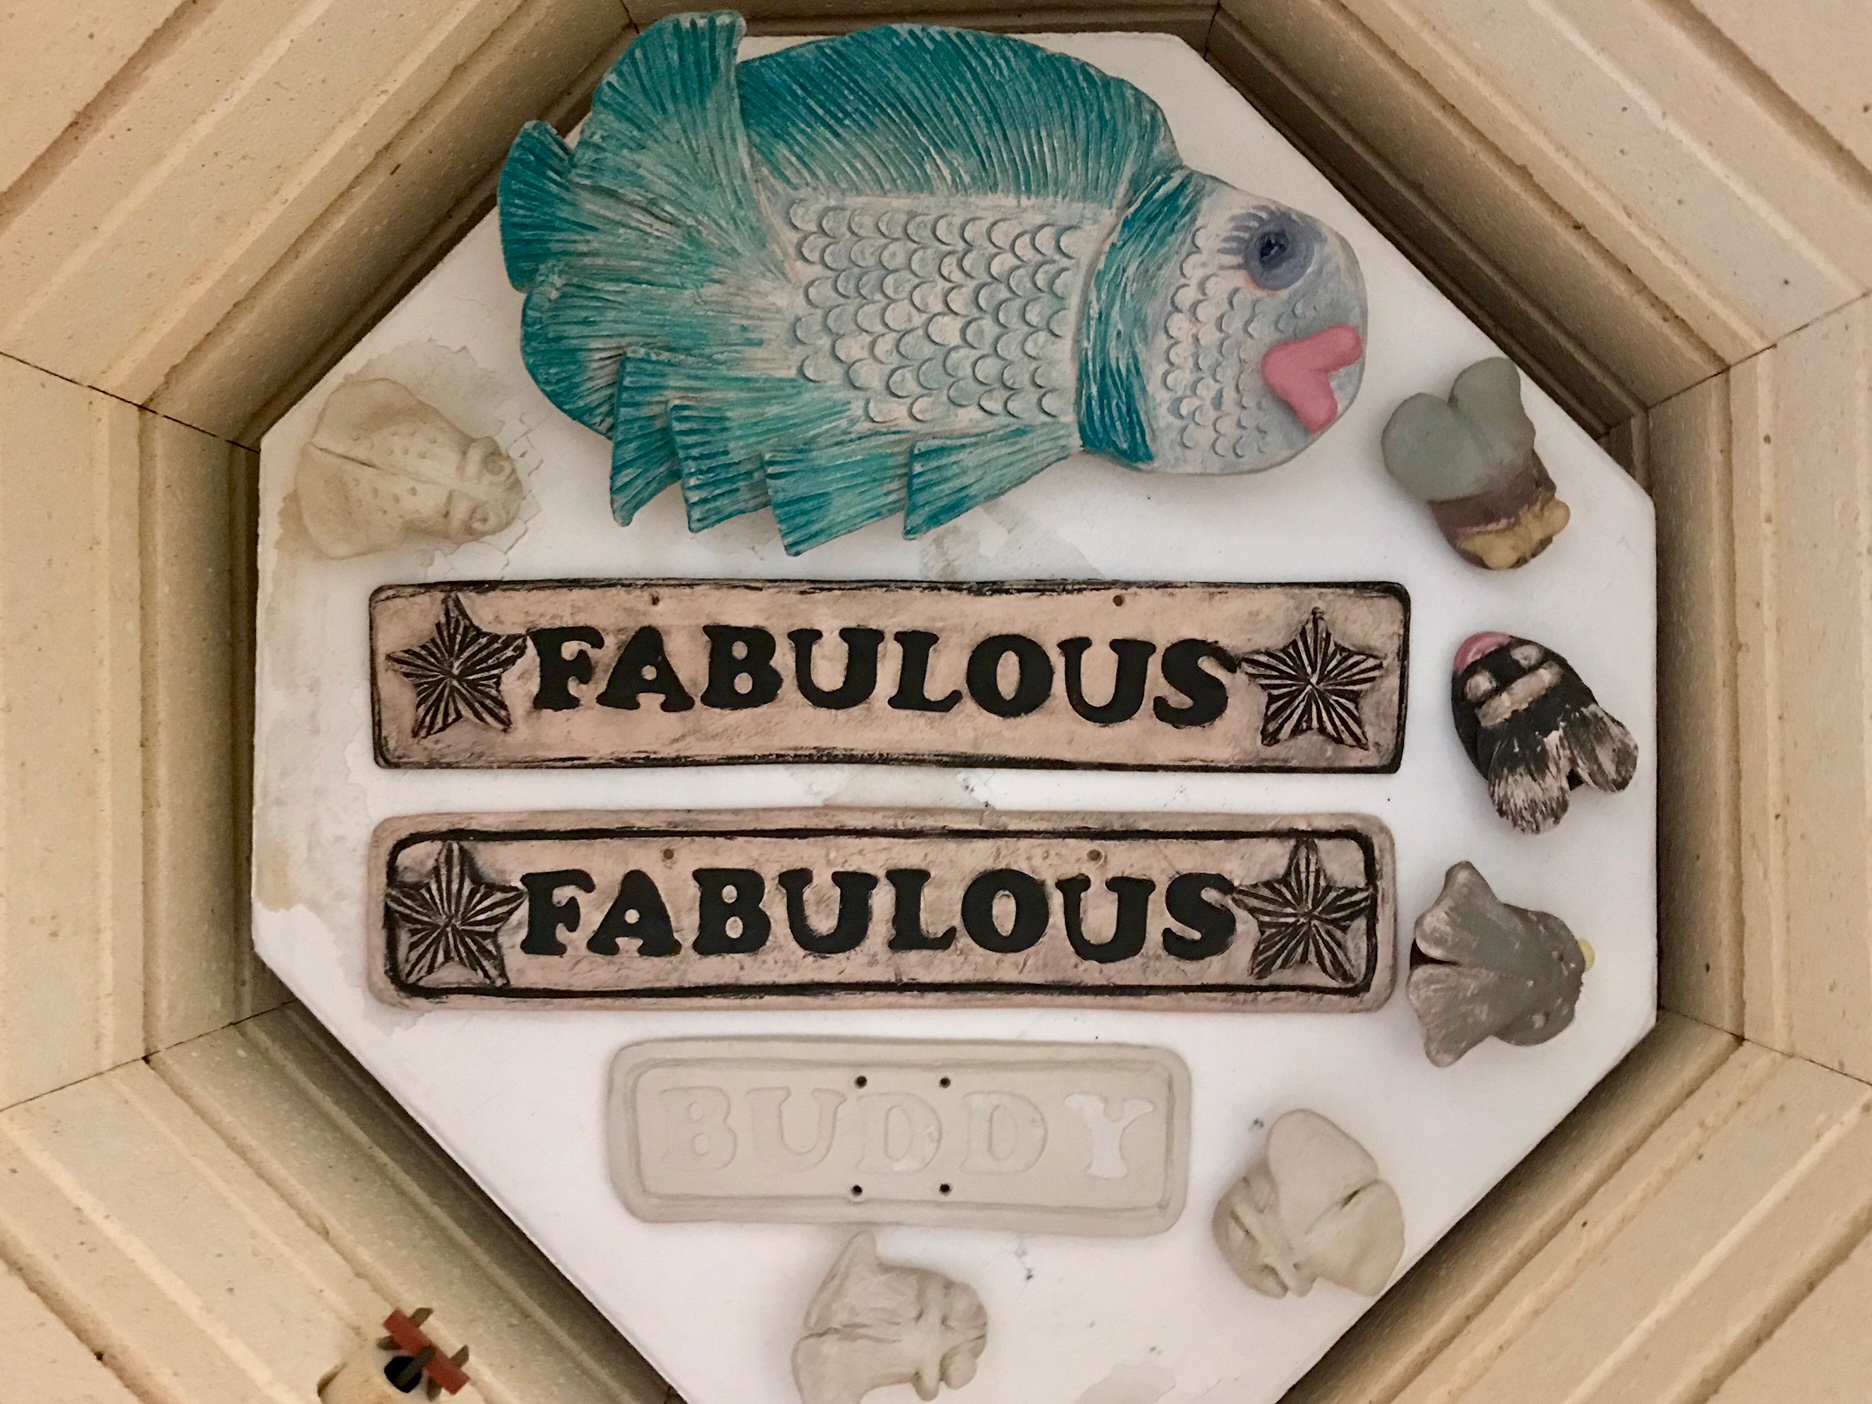
After the glaze firing, the bugs needed enhancement with Luster overglazes.  Lusters contain precious metal elements, such as real gold, which give a glittery and/or iridescent effect.  For most of the bugs, Black Luster was used to make their bodies shinier, and to highlight their wings.   Opal Luster was applied to wings (including underneath). Gold Luster was applied to lips, eyes, and/or to highlight the tips of wings.  The pieces were re-fired at Cone 020 (1180 F), with the end result being a shimmery finish, gorgeous to look at.

Created 2 antennae and 6 legs from gold wire which was threaded through holes in each bug, coiled with pliers.  The last step — no small effort — was to wrestle the bugs onto their driftwood mounts using vintage copper tacks.

December 2017 (6+ months later) — The inspiration of seeing a little black beetle evolved in my brain and hands into totally unique and eye-catching fantastical art pieces.  Also appropriate for older children interested in insects — adorable companions or a great addition to a bug collection.

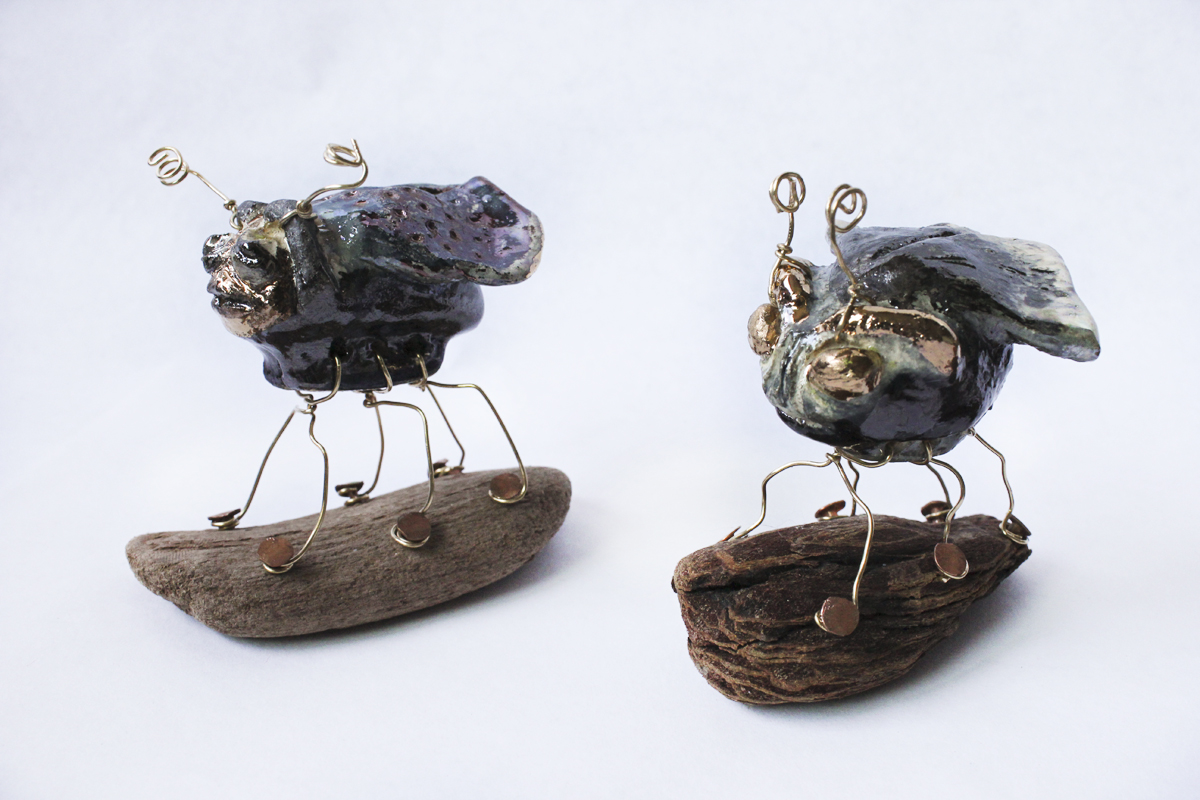
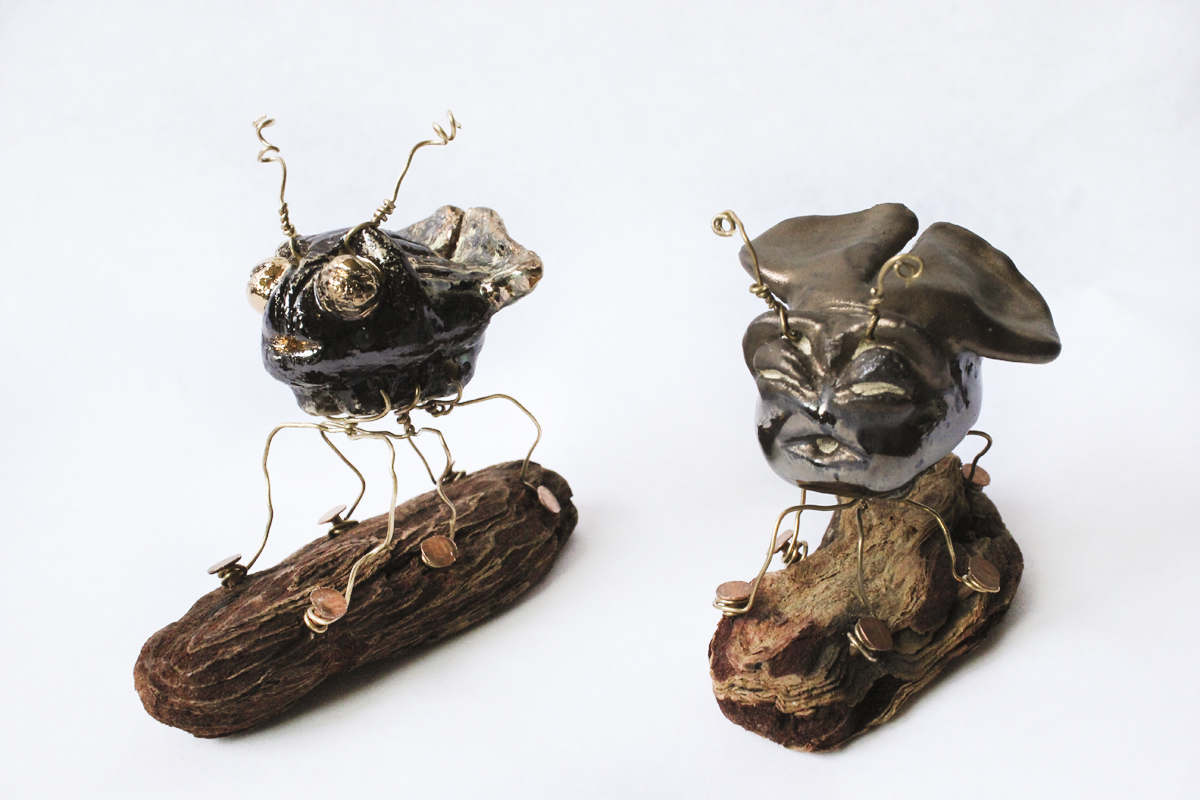
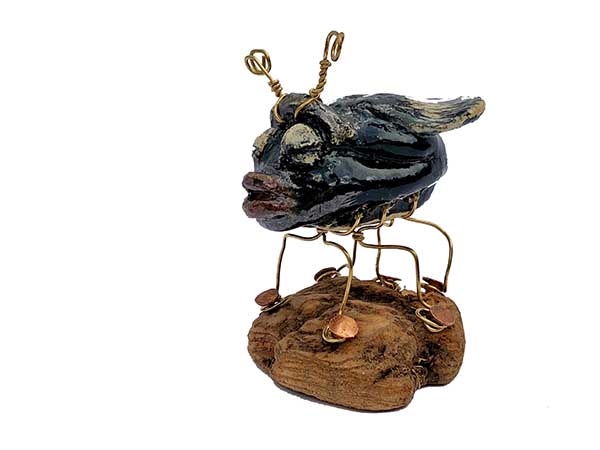
Each one measures approx. 2+″ x 3+” x 2+″

Listed for Sale on Etsy.com, click on LegalizePotteryShop.

Insect Invasion

posted in: Uncategorized | 0

Various fantastical bugs have invaded the Legalize Pottery Ceramics Studio — here they are on one of the shelves.

And here they are shown invading the kiln.

These insects still need to develop deep shiny coloring.  Then they’ll each grow some antennae and multiple legs.  And, I’d like to see them perched on pieces of driftwood.  Stay tuned for more about this swarm of captivating bugs.

Trio of Bowls

posted in: Blog | 0

Here are the preliminary results of my quest to make symmetrical pedestal bowls using a slump mold.  They progressively grew in size and stature, with the bottom-most being comparatively big, middle bowl being bigger, and top-most being the biggest and tallest.


So far, the process has involved cutting large slabs into large circles, and pressing them into a plastic-wrapped mold, and gently beating the clay into submission.  Then, the insides required seemingly endless smoothing, and much effort was required to make the lip even from all angles.  The drying process was arduous, gradually getting the clay to the point where the bowls would maintain their shape so that I could flip them upside down onto a slightly smaller mold.  While the bowls were propped up from the inside, I was able to smooth the outsides and attach a pedestal.

While I left the first bowl with smooth sides, I carved closely-aligned crevices into the outsides of the top 2 bowls.  This was done free-hand with a linoleum cutter — my favorite tool — which was loads of fun and turned out surprisingly well.  Next stop is the kiln for bisque-firing

Legalize Pottery’s School of Fish Continues to Grow

posted in: Blog, General | 0

I just can’t seem to stop creating fish ceramics.  Here’s the latest creation, still pretty fragile, in the process of hardening (greenware stage).   Notice I’m using ‘fish wrap’ to cradle the piece while it is drying.

img_0571

Below is a smaller fish which just survived bisque firing, and now ready for glazing.

Feel the Summer Energy Rising

posted in: Blog | 0

This Summer has started out auspiciously — with a rare “Strawberry Moon.”  A full moon shone on Summer Solstice (June 20) — the longest day of the year.  Hasn’t happened since 1967, and we all know what a great year that was!   Won’t happen again until 2062 — pending intervening unknowns.

So, I’m trying to make Summer plans that are equal to this auspicious start, involving heretofore unknown feats involving ceramics.  I was inspired by attending “Open Studios” last month, in particular one artist who recently switched from 2D (painting) to 3D (ceramics) and was cranking out some amazing work.  Since then, I have begun some cranking out of my own:

Fish Dishes — each one unique . . .

IMG_0387 IMG_0385


Shallow Serving Bowls — with enough breadth (11”) to accommodate my propensity to carve carve carve.  The first pic reflects my favorite ceramic subject which is fish.  The second pic reflects another of my favorite things, words. The idea of carving words was inspired by an acquaintance who was spouting off about people really liking things (artwork) with sayings on them.  Plus, I was enamored with Ms. Bockle’s words in a recent MoveGirlGO post which I paraphrased . . .

IMG_0435IMG_0397


I’ve got loads more clay on hand to keep me busy for the rest of the Summer, and hopefully I’ll continue to “feel my energy rising.”

Square Plates Edged with Sgraffito

posted in: Blog, General | 0

I’m continuing to add sgraffito to some of my recent projects, including these two sets of square dessert plates.  On the 1st set of 4 plates, I applied 4 coats of jade underglaze and used sgraffito tools to incise a design of branches around the edge.  On the 2nd set of 4 plates, I applied 4 coats of black underglaze (4 coats) and increased the complexity of the carving.  These pictures were taken before firing (greenware stage).  The plates measure approx. 6″ x 6″, made of cone 10 stoneware.

IMG_0277IMG_0280

Vessel Vase with Sgraffito

posted in: Blog, General, Uncategorized | 0

To make a large classically-shaped vase, an ancient technique is to use fat extruded coils, and flatten them out — making “slab coils”.  Two large bowl shapes were made from the slab coils being wound and stacked and smeared together.  After resting a bit, the two bowls were joined rim-to-rim into a roundish vessel.   A foot and neck/rim were added from more slab coils. A band of underglaze was applied to the belly of the vase, and I used “sgraffito” tools and a linoleum cutter to carve an abstract design into the underglaze. After bisque firing, an ivory underglaze was applied above and below the sgraffito area, and inside the vase. VA Clear glaze was used inside and outside, with a thick coat on the rim. The overall effect is pleasantly rustic.

scraffito_vase_topscraffito_vase_detail

(Measurements 9-1/2″ tall, approx. 6-1/2″ diameter)

Tall Vase with Leaf Motif

posted in: Blog, Uncategorized | 0

This recently-completed vase (measurements 9-1/2″ tall, 3-3/4″ diameter) was made from slabs, using a cylindrical form.  A half-dozen interesting autumn leaves were pressed into the damp clay, and 3 coats of black slip were applied.  After the bisque firing, the inside was coated with John’s Black glaze, and the outside was dipped in VA Clear glaze.  The imprinted leaves turned out speckled, and their stems and ‘veins’ show up nicely.  The overall effect on the outside is streaky and bark-like, enhancing the appearance of the leaves.

leaf_vase2
leaf_vase_detail


Vases Made with Slabs and Coils

posted in: Blog, Uncategorized | 0

Making bigger pieces by hand is made easier by the use of slabs (made with the slab roller) or building with coils.

Image 1Vase #1 is made from one large slab wrapped around a cylindrical form.  I plucked some interesting leaves from a tree in the courtyard just outside the Studio, and pressed them into the damp clay, and coated the outside with black slip.  The video clip below was made after bisque firing at Cone 08.

ImageVase #2 is made from fat (3/4″) extruded coils made with an extruder which I flattened slightly with a roller, making “slab coils.” Using slab coils sped up the process of building the sides of the forms, and also resulted in thinner (less clunky) walls of the vase.  I built two 7″ diameter bowl-like shapes and pressed them together to make a round shape, and added a neck and base using more slab coils.  I painted 3 coats of black underglaze around the belly of the vase, and let it dry to leather hard.  Then, I used the sgraffito technique to decorate the vase, scratching off the underglaze with a linoleum cutter, creating a contrasting pattern and texture, revealing the clay underneath.  The video clip below was made at the greenware stage.


Sol Y Luna Boutique

posted in: Blog, General, Uncategorized | 0

10418913_960400180641610_6790559014926793427_nThe Sol Y Luna Boutique/Gift Lounge in San Carlos, CA is offering plaques and mugs from Legalize Pottery!  In addition to ceramics, there are other unique gift items — scented candles, jewelry, body care, and one-of-a-kind clothing for the selective shopper.  

Here is the information about the Boutique:
10653855_960400120641616_1764489438258315183_n

Sol Y Luna Gift Lounge
1321 Laurel St. (Upstairs)
San Carlos, California

Hours are:
Tuesday/Thursday: 11:00-6:00
Fridays: 12-5 and Saturdays: 12-4.

Sol Y Luna Phone: 650-631-7401