Vases Made with Slabs and Coils

posted in: Blog, Uncategorized | 0

Making bigger pieces by hand is made easier by the use of slabs (made with the slab roller) or building with coils.

Image 1
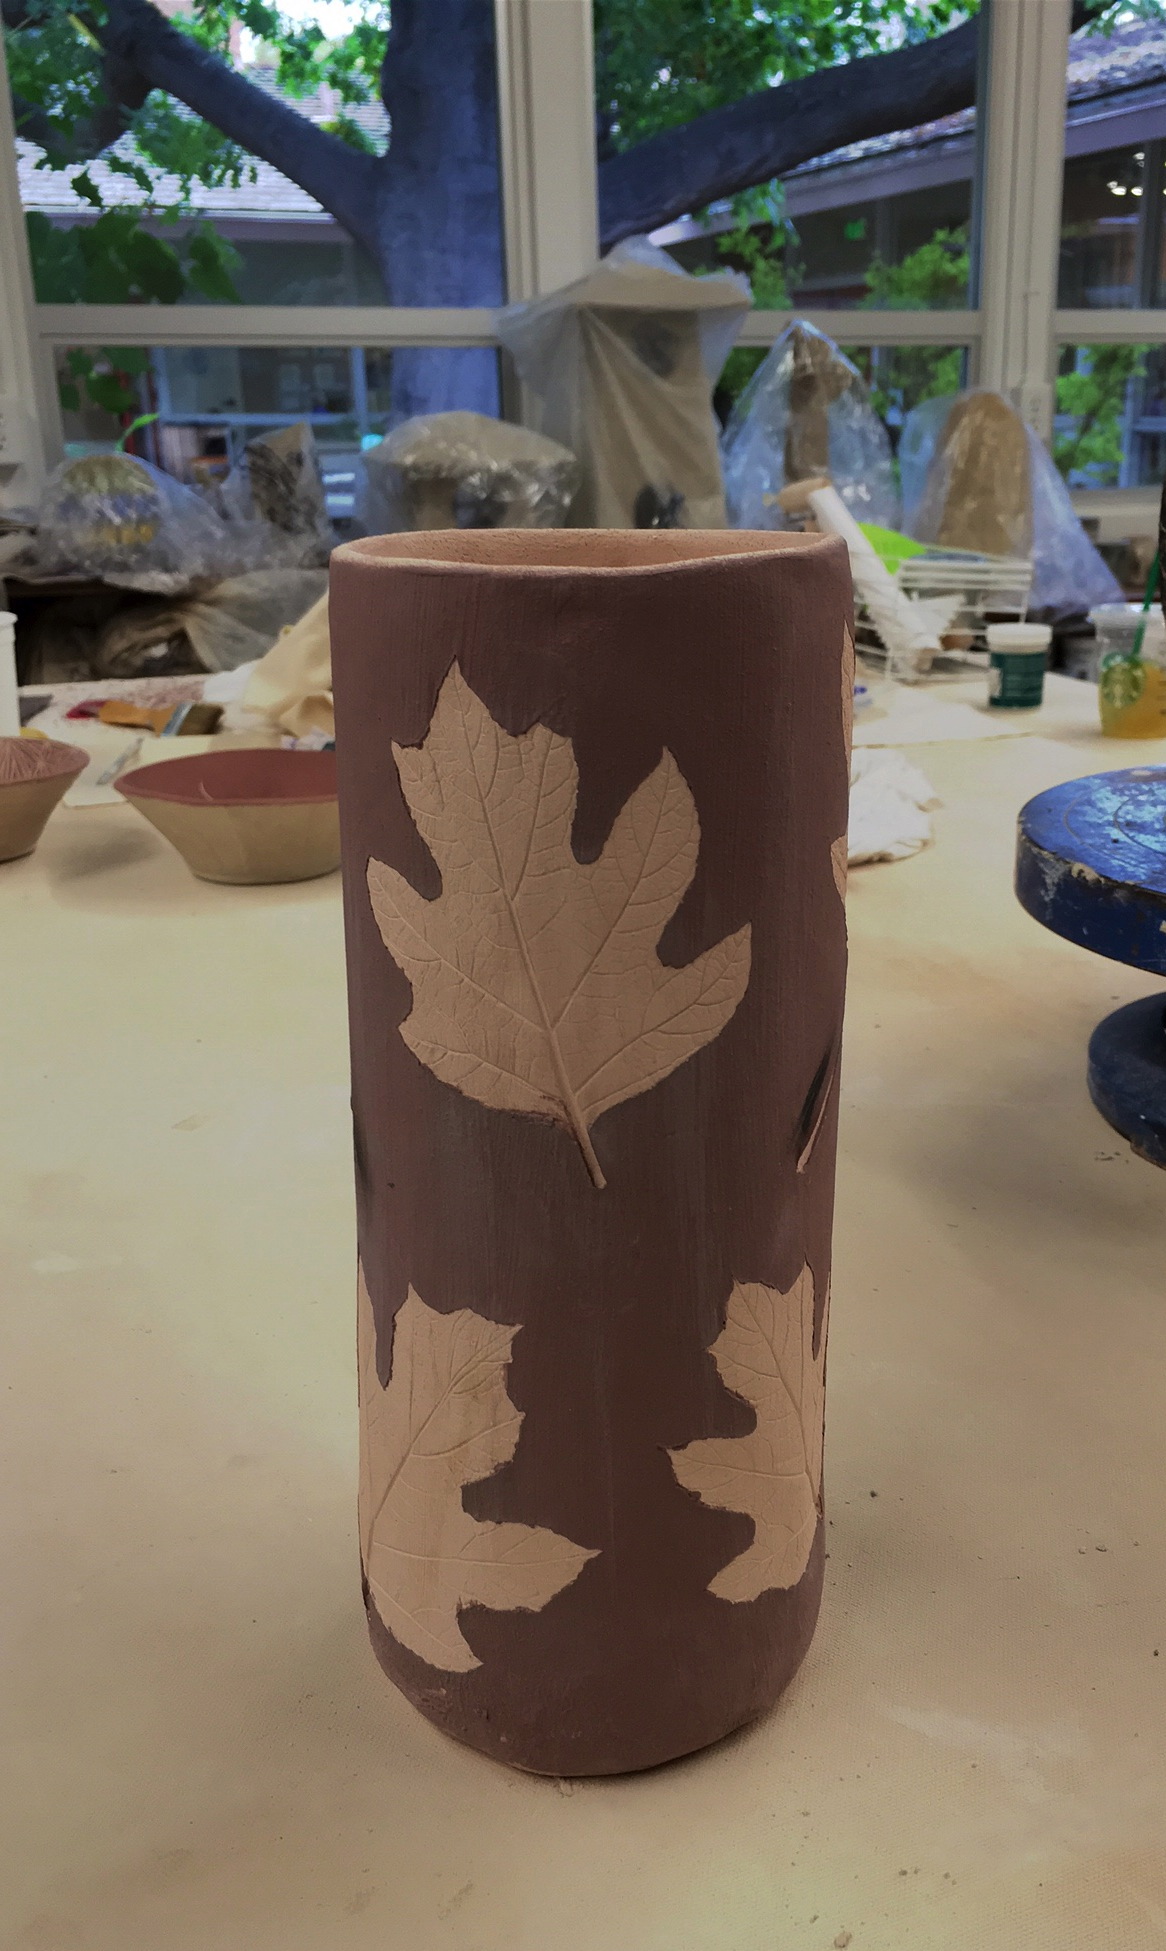
Vase #1 is made from one large slab wrapped around a cylindrical form.  I plucked some interesting leaves from a tree in the courtyard just outside the Studio, and pressed them into the damp clay, and coated the outside with black slip.  The video clip below was made after bisque firing at Cone 08.

Image
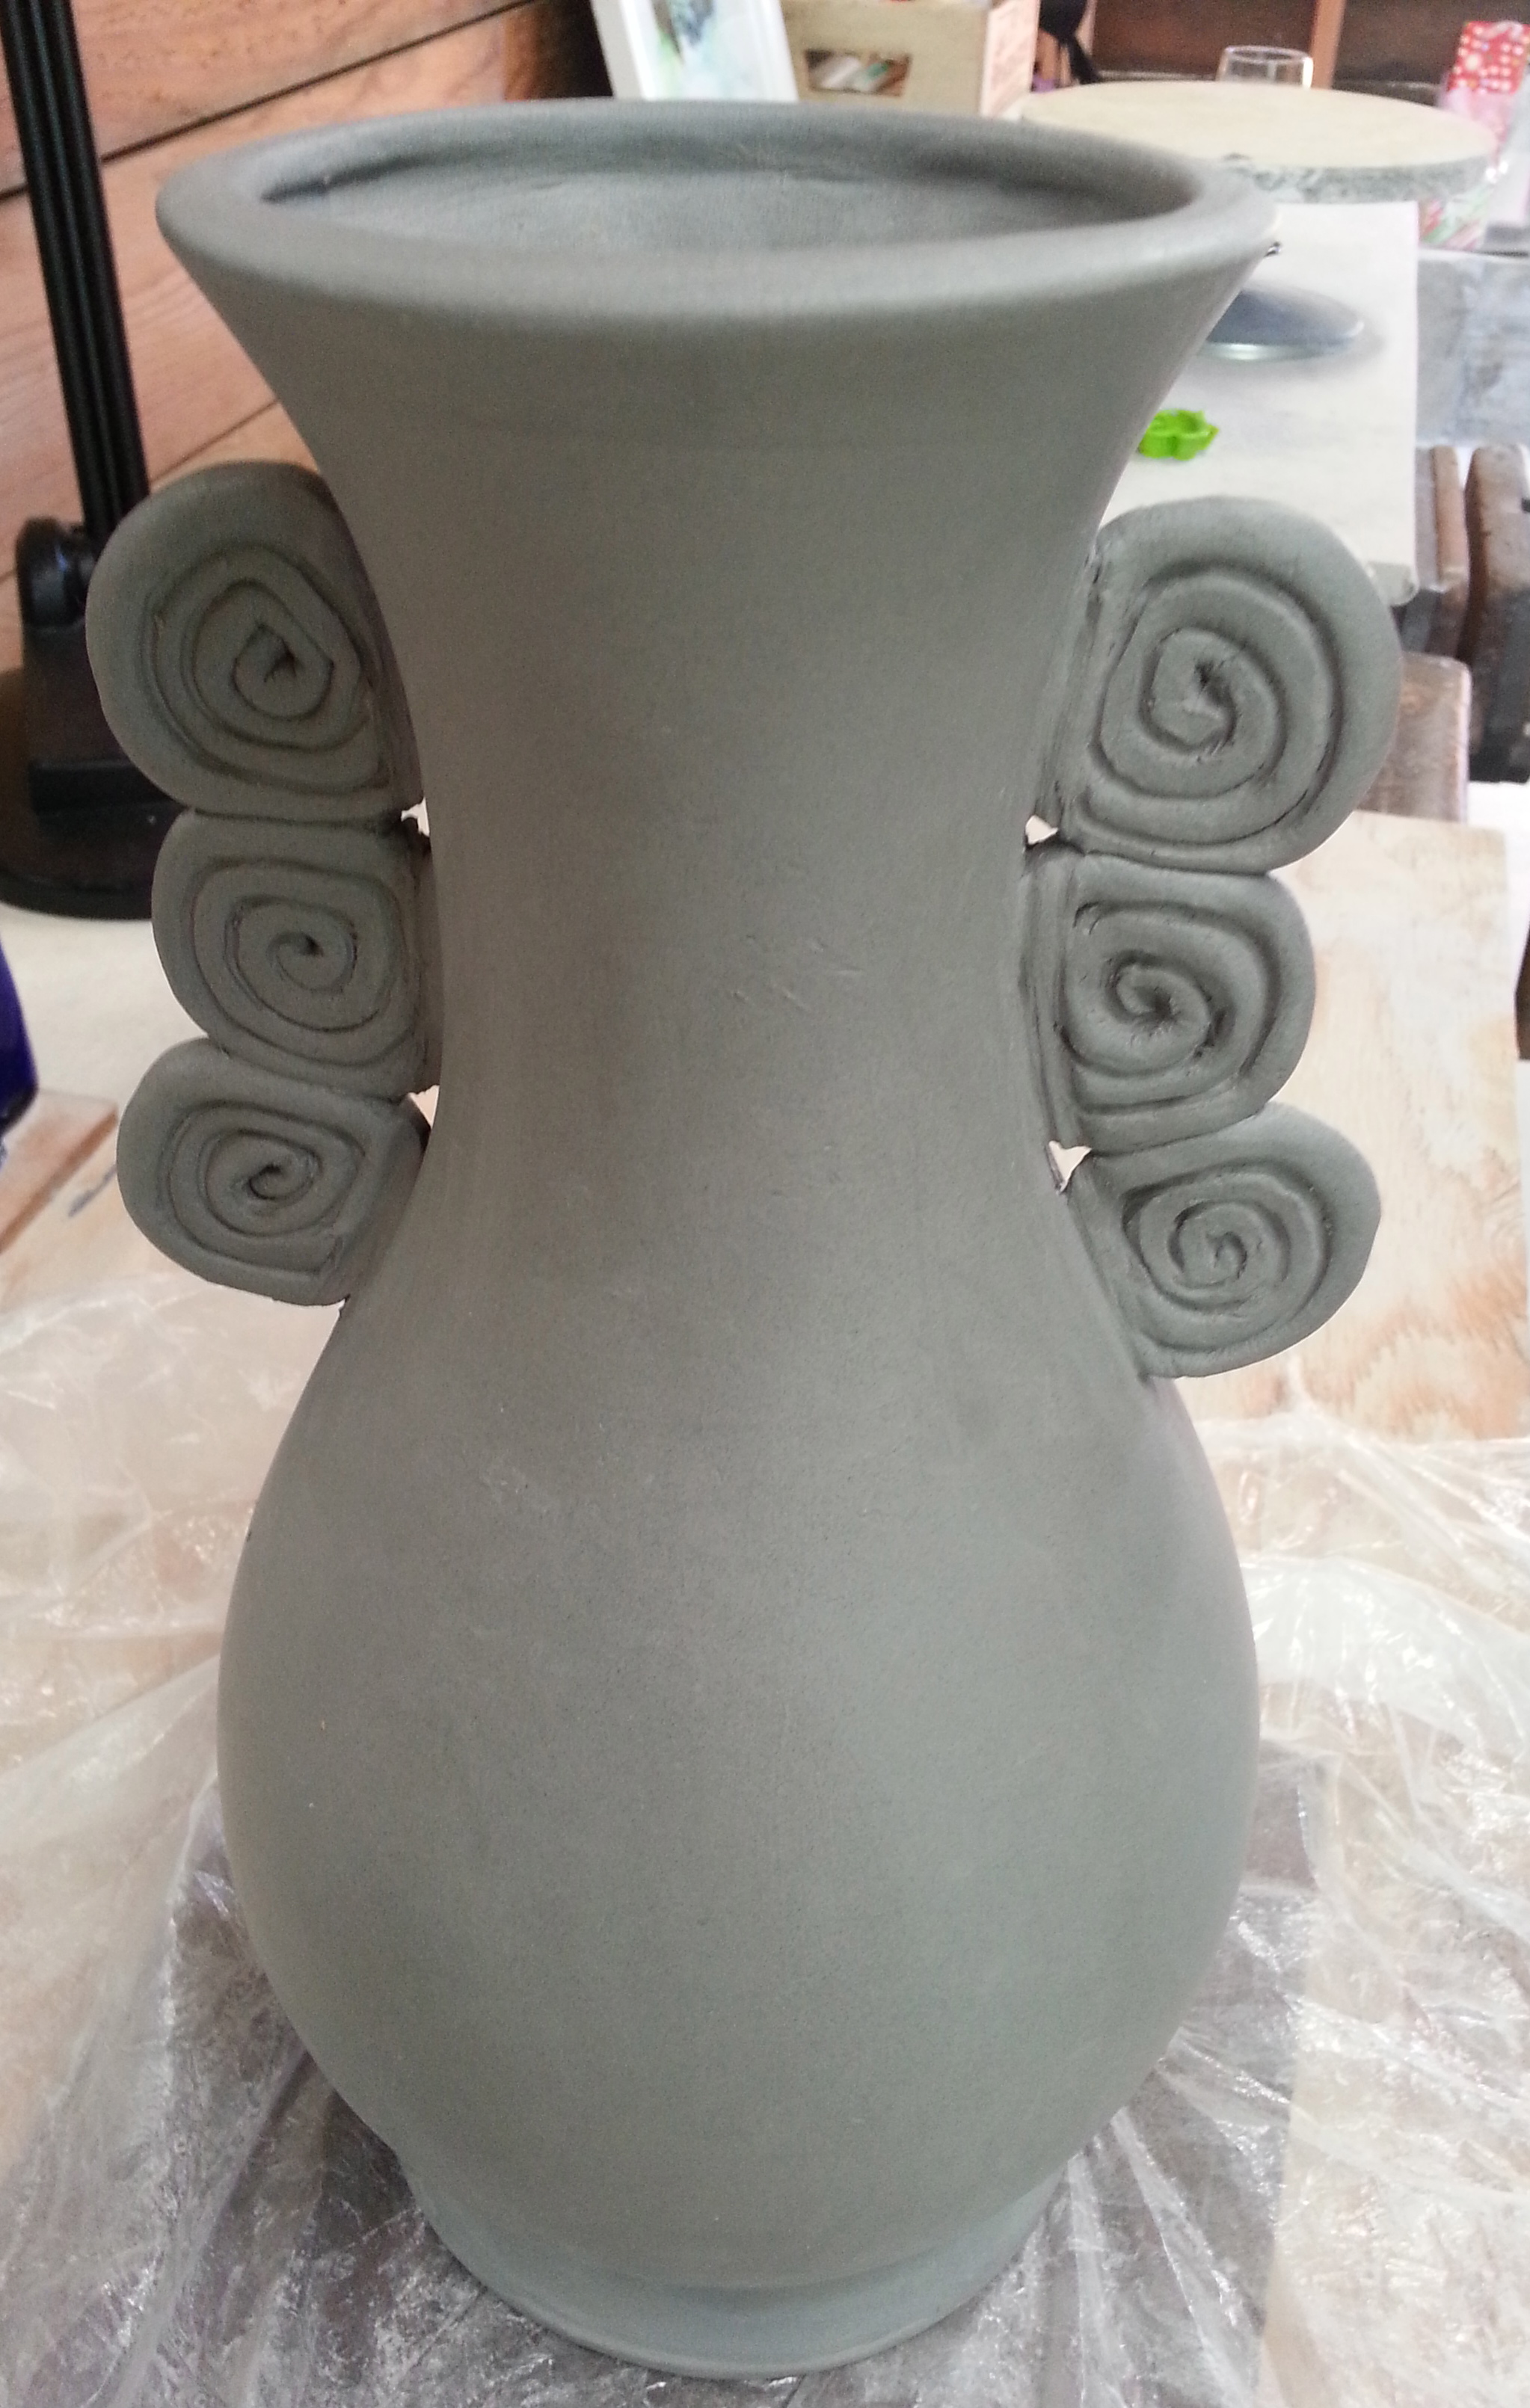
Vase #2 is made from fat (3/4″) extruded coils made with an extruder which I flattened slightly with a roller, making “slab coils.” Using slab coils sped up the process of building the sides of the forms, and also resulted in thinner (less clunky) walls of the vase.  I built two 7″ diameter bowl-like shapes and pressed them together to make a round shape, and added a neck and base using more slab coils.  I painted 3 coats of black underglaze around the belly of the vase, and let it dry to leather hard.  Then, I used the sgraffito technique to decorate the vase, scratching off the underglaze with a linoleum cutter, creating a contrasting pattern and texture, revealing the clay underneath.  The video clip below was made at the greenware stage.


Fish in 3D

posted in: Blog, Uncategorized | 0

I’ve made loads of Fish Dishes in the past, 22 at last count, and the Legalize Pottery site has a whole page devoted to Fishes.  But so far the fish have been two-dimensional.

large_green_fish_goldlips_platter_side


While functional, my Fish Dishes aren’t what fish are all about, so to speak.  Now I’ve started to make some three-dimensional fish — sculptural, decorative, more fish-like, with a whimsical flair.

The basic technique is to start with a pinch pot, close up the top, and use a paddle to beat it into shape (no fish were hurt or injured during this process).  With the time-consuming addition of eyes, lips, tail, fins, scales, the fish is complete.  As a bonus, some evolutionary feet were added so the fish can properly stand for viewing.

IMG_0150


Top fish – before bisque firing


Bottom fish – after bisque firing


bisqued_fish_detail


Detail – after bisque firing


Lastly, the glazes were applied – underglaze for the eyes (covered with clear glaze and a coat of wax), followed by Raku glazes —  Matte Blue (body) and Shiny Abalone (accents). Raku fired in a gas kiln to 1800+ degrees, and cooled in a bucket with sawdust & crumpled newsprint.  The first completed sculptured fish ended up with unique coloring which varies on either side.

raku_fish_side2 raku_fish_side

Review of 2015 Thus Far

posted in: Blog, General, Uncategorized | 0

In the 1st part of 2015, while my house was being remodeled, I virtually lived in my ceramics studio. That is, I moved my kitchen table & chairs, refrigerator, microwave, computer, etc. into the Studio, and the Studio is where I did all my cooking, ablutions/make-up, paperwork, etc.  At the end of each day, I went back into my torn-up house to watch TV and sleep. This routine was not very conducive to making ceramics.

However, I did manage to create a Legalize Pottery Shop on Etsy. To visit, please click on the link!
Etsy Shop

I also started a Legalize Pottery Shop page on Facebook. To visit, please click on the link!
Screenshot 2015-08-31 09.28.34

By April, some pieces made it into the kiln and came out fairly decent.

ceramics2015

For a Pop-Up Sale in early June, I got the idea to make a batch of Plant Stakes for Weeds — how appropriate for Legalize Pottery.

Image

Then, I took a detour into Sculpture — and made a rudimentary human figure.
Image Image 1


Now, it’s back to the classroom — I’m enrolled at Palo Alto Art Center for the rest of the year, with an awesome instructor/ceramicist named Malia Landis.  In the next few months, I’ll be posting the results of that adventure.

Foray into Sculpture

posted in: Blog, General, Uncategorized | 0

Last month, to jump-start my creativity, I decided I should pursue ceramic sculpting (which I’ve been meaning to do for years now), and signed up for a class in San Francisco (http://dikarevart.com).

After looking through art books for inspiration, I opted to go for a prone skinny figure.  The teacher made the great suggestion of first making a tile for the sculpture to be lying on.

After the first week, it looked like this — ready to dry out and fired at Cone 04.Image


Returned after 2 weeks, and spent the next few hours sanding it down, applying copper oxide and turquoise underglaze, and finally coating the tile with watered-down glossy white glaze. Here’s what it looked like, ready for firing.  Image 1


It looks like, in spite of a sluggish start, this Summer may yet turn out to be full of creative accomplishments.

Pop-Up Ceramics Sale

posted in: Blog, Uncategorized | 0

I’ve been preparing for a Pop-Up Ceramics Sale in San Mateo Central Park on Saturday, June 6, 10 AM to 4 PM.  The show features various potters who attend classes at the Central Park Ceramics Studio, along with our wonderfully talented instructor Debbie Debra Gardner Abarca.

I’ve just finished some cute mugs and whimsical plant stakes especially for the Sale!

black_white_goth_mug_back mug_mauve_dots_side2 wild_weeds_stakes_front wild_weeds_stakes_back

3D Ceramics Transformed into 2D Artwork

posted in: Blog, Uncategorized | 0

A Favorite Blue Fish PlatterQuite some time ago, I made a whimsical Fish Dish with multiple fins, elaborate tail, gills, scales, big lips and eye.   Multiple carving tools were used to create texturing and crevices.  Cobalt Blue Oxide was applied for highlighting the various features, red iron oxide was used on the lips.  Celedon glaze was brushed on.  (Hand-built from High-Fire Porcelain, dimensions are 7″ x 4″)


IMG_1824A few months later, this same Fish Dish was cloned, and became something entirely unexpected.  That is, my niece created a beautiful 2-D image of this Fish Dish, somehow transforming it into a piece of framed artwork.  My niece is not divulging the techniques for making this beautiful image, although there appear to be some watercolor elements.   All I know is — somehow my work was transformed into something else which can be considered to be true art.  I love this piece times two!


Boxes with Driftwood Handles

posted in: Blog, Uncategorized | 0

brown_box_front

Recently I made a trio of small boxes with driftwood handles attached via wire wrapping.  The perfect size for wish boxes or jewel boxes. The dimensions are in the range of 2-1/2” more or less. The pieces were extruded from mid-fire porcelain.


green_box_side

At the bisqueware stage, underglazes were applied, plus a coat of clear glossy glaze.  After the pottery was glaze fired, one coat or multiple coats of lusters were brushed on. Lusters contain metallic elements, to give an iridescent effect.


small_green_box_side

The mottled halo effects that appear in the top picture were made by touching and re-touching the surface with a dispersing agent using a brush point.  The pieces were then refired at cone 020 (1180 F).

Summer Projects

posted in: Blog, Images, Uncategorized | 0

As usual, I skipped the Summer Session of my ceramics class, and instead worked on my own. Also as usual, accomplishments fell short of the goal, and there are only a few finished pieces so far, and fewer still are worth sharing.

Fish Dish #18, per customer’s specifications . . .

Image
Plaque (reversible), wire hanger with beads . . .Image 1

Spindly-legged stand with fish carving, inlaid with colored glass particles . . .Image

I spent most of my time slip-casting and trying to alter the results into something unique. I acquired several different molds and 4 gallons of slip, and spent lots of time/effort making the pieces ‘artsy’ rather than ‘crafty’ BUT not quite there yet.

Pyramids embellished with fish . . .IMG_1819

Work in Progress . . .